Showing posts with label FOTD. Show all posts

Saturday, 14 July 2012

My current go-to neutral makeup

I am a creature of habit... and laziness. I really can't be bothered to search out different products every morning before work so I tend to use the same things for a few days and leave them in my makeup bag. Then I switch them out and try other products. This is probably because I have so much makeup and it is poorly organised to grab it as needed.


I've been wearing this makeup a lot lately and I often wear something similar to this. Gold is my favourite eyeshadow colour, I find it really flattering and brightens and opens up my eyes which is so needed when I'm tired. It also works well on most people. If you are curious, my favourite gold eyeshadow is Urban Decay Baked. It is a beautifully soft and pigmented gold which isn't too yellow or brassy, just perfect.

For this makeup, I wanted to make use of my pigments which don't often get much attention from me - they are harder to use than pressed eyeshadow and make a mess. I loved how it turned out and I need to use pigments more often.


What I used:
Urban Decay Primer Potion
MAC Water Based Mixing Medium
Illamasqua Marvel Pure Pigment
MAC Cocomotion Pigment
Shiro Cosmetics Master Sword
MAC Twilight Falls Mineralize Eyeshadow
a highlight shade (can't remember what I had in my makeup bag now)
MAC Superslick Liquid Liner in On The Hunt (black)
No7 Fanomonal Mascara
Illamasqua Thunder Brow Cake (eyebrows)

Jennifer xx

Thursday, 3 May 2012

A couple of makeup looks

I found these photos on my computer of some previous makeup looks that I have worn and never posted so I thought I'd put them up now anyway. I can remember what I'm wearing in these however.


The top one is the kind of makeup I wear a lot and the bottom one is what I tend to go for when I want to wear more colour on my eyes.

Jennifer xx

Wednesday, 14 March 2012

Candy Yum Yum FOTD


I wore this for one day last week. I really love this lipstick, it is so smooth and long lasting. Unfortunately it was a limited edition but I was lucky enough to get hold of it before it sold out. BUT it might be coming back in the MAC By Request collection which you can vote for now at MAC By Request and you can do one vote each day so if you want it back, GO VOTE.

What I'm wearing:
Bobbi Brown Skin Foundation in Beige
Collection 2000 Lasting Perfection Concealer in Light
MAC Mineralize Skinfinish Natural in Medium Plus
MAC Amber Lights Eyeshadow
MAC Superslick Liquid Liner (black)
MUFE Smokey Lash Mascara (I will have to review this because I'm not a big fan)
Collection 2000 Clear Mascara through my eyebrows
MAC Florida Cremeblend Blush
MAC Candy Yum Yum Lipstick


Jennifer x

Tuesday, 31 January 2012

My New Year Makeup

I know it was a whole month ago but I found these photos and thought I'd show you what my makeup was like for New Years, plus there is one documenting one of the rare occasions that my boyfriend wears a proper shirt haha!

Martin and I for New Years

I can't remember the exact makeup I am wearing but the lipstick is Chanel Dragon and on my eyes are some neutral eye shadows with black liner and Urban Decay Heavy Metal liner in Baked (gold)

Jennifer x

Monday, 31 October 2011

Happy Halloween!

Happy Halloween! Hope you enjoy whatever you're doing tonight. I don't celebrate Halloween but wanted to do some Halloween makeup. This is the first time I've ever done anything like this and I don't have any products such as liquid latex or spirit gum etc to do anything really creative so had to make do with what I had in my makeup collection. As per usual, I leave everything to the last minute and ended up doing this last night. I didn't know what I wanted to turn myself into and ended up making it up as I went along. I think it looks a little bit zombish although could have done with some more cuts and veins and rot haha - maybe next year.


I already had my makeup on from the day, my eyeshadow was very neutral in skin tones with a tiny bit of shimmer. This was mostly covered up. Because I didn't want it to look perfect, I just added more on top of what I already had on.

What I used:
  • White eyeshadow (MAC Gesso) applied all over with a small foundation brush, packed onto my skin and 'scrubbed' in to get it to look a little patchy. I couldn't find a very light foundation to use cheaply yesterday so made do with eyeshadow but you could use a light foundation instead.
  • Taupe-grey eyeshadow as a contour on a round eyeshadow brush to sketch out the shape and then blend downwards. Soften with a fluffy contouring brush. I used MAC Copperplate through my cheekbones, around the top of the nose to add shadow and depth to the eyes and along the jaw bone.
  • Brown-red eyeshadow under the eyes to make them look sore, I used MAC Folie. I also used this colour in areas where I wanted my skin to look bruised.
  • Grey eyeshadow under the eyes and on the lids to make them appear deeper set. I used MAC Scene.
  • Matte black eyeshadow all over the lid and underneath for a dead and smudged makeup appearance.
  • Reddish plum purple eyeshadow, I used the one from Sleek's PPQ palette to use around the bruised areas to darken and deepen the look of the bruises, I also used it in areas around the mouth and also smudged the excess on the brush around the nose to make my skin look blotchy.
  • MAC Cream O Spice lipliner all over lips, use something brownish.
  • For the blood I used MAC's Kissable Lip Colours in Love Peck and Strut Your Stuff. Fake blood would be ideal, liquid and gel based would give the best effect.

I also did a Halloween nail design.


I already had the base colours on for this, they are one of the new Nails Inc Gossip Girl kits (the Lily set). It is a deep plum black creme finish with a flake polish on top which flashes red-orange-green. I added China Glaze's Ghoulish Glow (glow in the dark nail polish) over the top of all fingers except the ring fingers. I used Illamasqua Gamma (neon orange) for the pumpkin and OPI Jade is the New Black (medium green creme) for the stalk and swirly leaves. I then added the face in China Glaze Liquid Leather (black creme).

I wasn't able to get a photo of the polish glowing in the dark, my camera just wouldn't pick it up, I probably need to figure out the correct settings. It is subtle but does glow. It needs to be in the light for a while to 'charge', it will eventually fade out and not glow, just like children's glow in the dark stars do. It also mutes the colour down but I like it for this as it makes it a swampy greenish colour.

Enjoy your Halloween!

Jennifer xx

Sunday, 7 August 2011

Using Sleek Monaco Palette - Mixing Greens

As you might know, I am a complete green fiend. Green is my favourite colour, especially to wear on my eyes. In Sleek's Monaco Palette, there is only one green and I found myself wanting to create a green look and wanting to add other greens into the look but that would defeat the object of using only this palette. So I decided to mix my own greens using other shades in the palette to darken the existing green.

This is what I came up with...

Read on for more...

Tuesday, 2 August 2011

Using Sleek's Monaco Palette - Mermaid Teals

My next look with Sleek's Monaco palette was inspired by mermaids, the blues and greens of the sea and shimmer. Green and teal are also my favourite colours to wear on my eyes, I think they bring out the green tones in them. I decided to put purply pink lips with it to finish off the bright look.


On my eyes I used Kiwi Zest (shimmery lime green) as the base colour, I added Aquamarine (matte turquoise) into the crease and blended upwards and slightly onto the outer part of the lid. I used Humming Bird (shimmery teal) through the crease to add definition and sparkle. Then I used Bamboo to blend all of the colours together nicely under the brow bone and to neutralise the pink in my brow bone. I applied Sunset (shimmery copper) along the lower lashes.

On my lips I wore MAC Rebel lipstick, gently patted on and smooshed together with my lips and then topped it with MAC's Fab Fun lipglass (this was limited edition with one of the lipglass sets from Tartan Tales last Holiday season - it is a sheer pink with iridescent sparkles, really pretty)

More Pics!

Thursday, 28 July 2011

Using Sleek's Monaco Palette - Barbie Pink

Number 3 of the looks I have created using the Sleek Monaco palette. This time I wanted to create a look with the bright pink, it ended up looking very girly and a little Barbie-ish so I thought I'd go with it and add some false eyelashes (terrible application I will add, I am really new to attempting these and I've not got the hang on it yet) and a bit of pink lipstick.


I used Lotus Flower (shimmery lilac) over the whole of my lids and then applied Magenta Madness (bright matte magenta) through the crease and blended upwards gently as it is quite a strong colour. I added some Moors Treasure deep in the lower part of the crease and then lined my upper lash line with it. I softened the line so it wasn't as harsh and lined my lower lashes along the outer third with the same shade. I then lined the rest of my lower lashes with Lotus Flower. I put a teeny bit of black liner on the outer part of my upper lashes to add a little flick. The false lashes I used were from Eyelure and were the natural volume ones (not sure if they have a number or proper name), they are subtle and suitable for everyday wear if you wish (and can apply them properly, unlike me lol).


Also used:
Chanel Vitalumier foundation
Bobbi Brown Creamy Concealer
Sleek Luminous Pressed Powder
NARS Laguna bronzer
NARS Orgasm blush
MAC Brow Pencil in Spiked
Urban Decay Primer Potion
Bobbi Brown Gel Liner in Black Ink
Chanel Inimitable Intense mascara in Noir
MAC Creme Cup lipstick

I wanted to see what it would look like with a brighter pink lipstick so I switched to MAC Chatterbox, one of my favourite lipsticks. I don't think the tone of the pink works as well as Creme Cup. I should have gone for something more magenta based, or even neon like MAC Candy Yum Yum.


Do you prefer the lighter or brighter pink lips?

I have 2-3 more looks coming up for this palette and then I'm going to move on to the Caribbean palette.

Jennifer xx

Wednesday, 20 July 2011

Using Sleek's Monaco Palette - Cranberry and Lime

Yesterday I put together another look using Sleek's Monaco Palette. This one took a bit of time to get looking right, it didn't start out very well but I stuckwith it and it worked in the end. I have liked using a contrasting colour along my lower lash line so did that here too. It also worked quite nicely with my hair colour at the moment which is much redder than it appears in the photos, going towards the cranberry shade on my eyes.


Heres what I did. I applied Washed Ashore (matte peach) over my whole lid then applied Sunset (shimmery coppery cranberry) through the crease with a 222 brush to get very soft difused shading as it faded out. I used Moors Treasure (matte plum) with a pencil brush right in the crease to add definition. Then I went back with the 222 to soften and blend into the cranberry. I added some Moors Treasure onto the outer part of my lids too and blended into the peach. I used Bamboo under my brows to sharpen the edges and blend into the other shades. Bamboo doesn't show up much on me but it works very well at neutralising redness and discolouration or blending together colours. Finally I used Kiwi Zest along my lower lash line. I didn't want a highlight colour as I felt I had quite a bit going on with the shimmery cranberry and lime.

Other products used:
UDPP
Philosophy Poreless Flawless Primer
Chanel Vitalumier
Bobbi Brown Corrector and Creamy Concealer
Sleek Luminous Pressed Powder
MAC Semi Precious Goldstone MSF
MAC Spiked Brow Pencil
Bobbi Brown Gel Liner in Black Ink
Chanel Inimitable Intense Mascara
MAC Gem of Roses Lipstick

Jennifer x

Tuesday, 19 July 2011

Using Sleek's Monaco Palette - Pink and Teal

I am really loving this palette, I have reached for it so much since I won Rachel's from All Things Rachy giveaway. I'm going to be posting some looks that I have created using it starting with this one which I did yesterday.


I used Lotus Flower (shimmery lilac) on my lid and then blended Magenta Madness (matte magenta) into the crease and upwards. I then applied some Moors Treasure (matte plum) into the outer corner and blended through the crease to darken and deepen. Lastly I applied a line of Humming Bird (shimmery teal) along my lower lash line.

Other products used:
Bobbi Brown Gel Liner in Denim Ink
Chanel Inimitable Intense Mascara
Bobbi Brown Corrector and Creamy Concealer
Chanel Vitalumier Foundation
Sleek Luminous Pressed Powder
MAC Semi Precious Goldstone MSF
MAC Spiked Brow Pencil
Chanel Rouge Coco Shine in Romance

Like? I will be posting a few more as and when I use the palette so keep a look out for them!

Jennifer x

Wednesday, 11 May 2011

Surf Baby FOTD

I played with some of my new Surf Baby products today, I was quite happy with how it came out. I also really like yellow on my eyes, this was the first time I'd tried it.


What I used:
MAC Studio Sculpt Foundation
Bobbi Brown Corrector and Concealer with powder.
Collection 2000 translucent powder through t-zone.
MAC Lush-Light Bronze Studio Careblend Powder on cheeks, into hairline, up to temples.
Urban Decay Primer Potion
MAC Sun Blonde Eye shadow all over lid
MAC Surf USA Eye shadow through crease, blended into the yellow and then blended upwards to get the true colour. Also along lower lashes.
Urban Decay Virgin Eye shadow under brow bone and blended into Surf USA.
MAC Spiked brow pencil
Bobbi Brown Longwear Gel Liner in Black Ink
Chanel Imitable Intense Mascara
MAC Hibiscus Lipstick


I felt very summery today :)

- Jennifer

Sunday, 27 February 2011

1920's Inspired FOTD

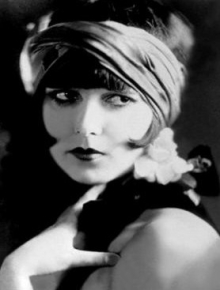
I love vintage styles, especially things from the 1920's and 30's like Art Deco and flapper dresses. Here are some of the images that inspired this look.

Clara Bow
Bebe Daniels

Louise Brooks

Anita Page
Marceline Day
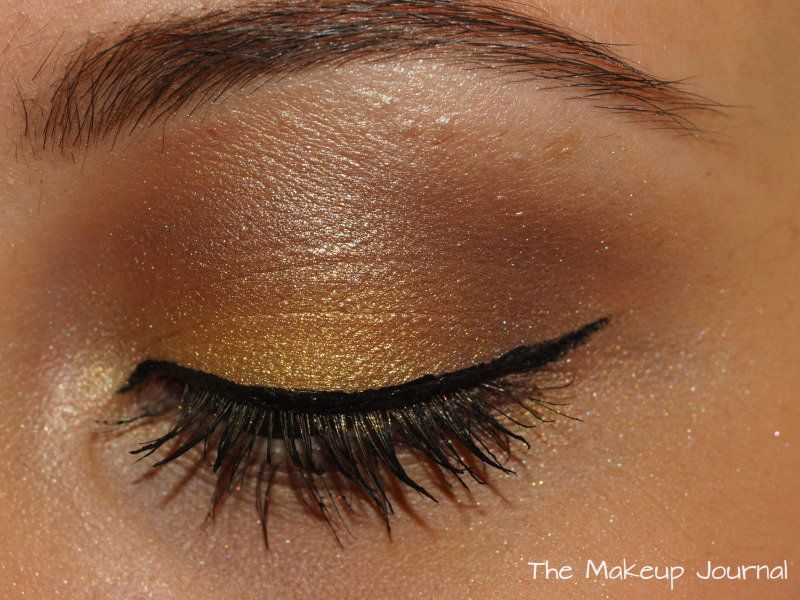
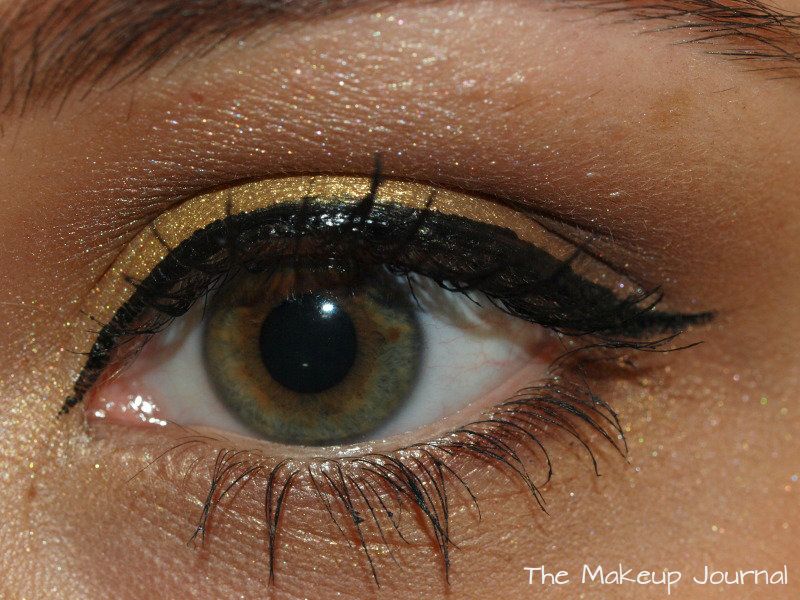
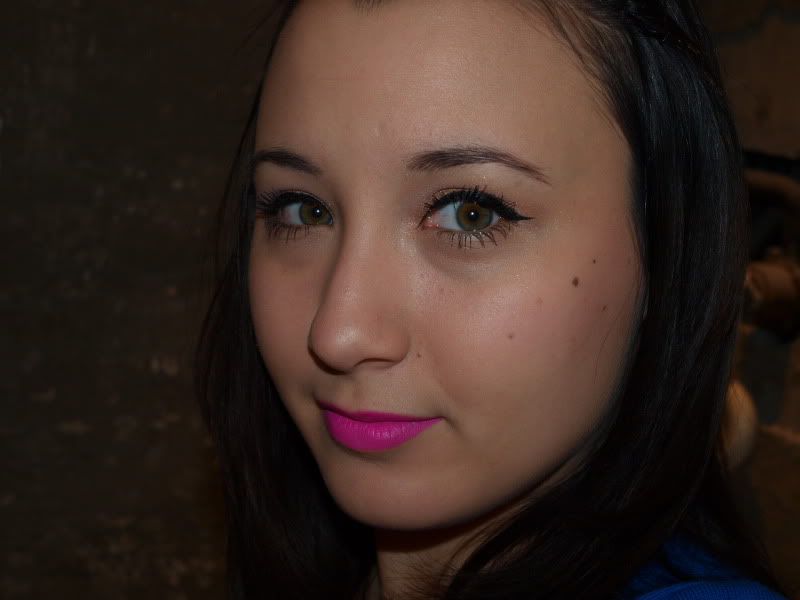
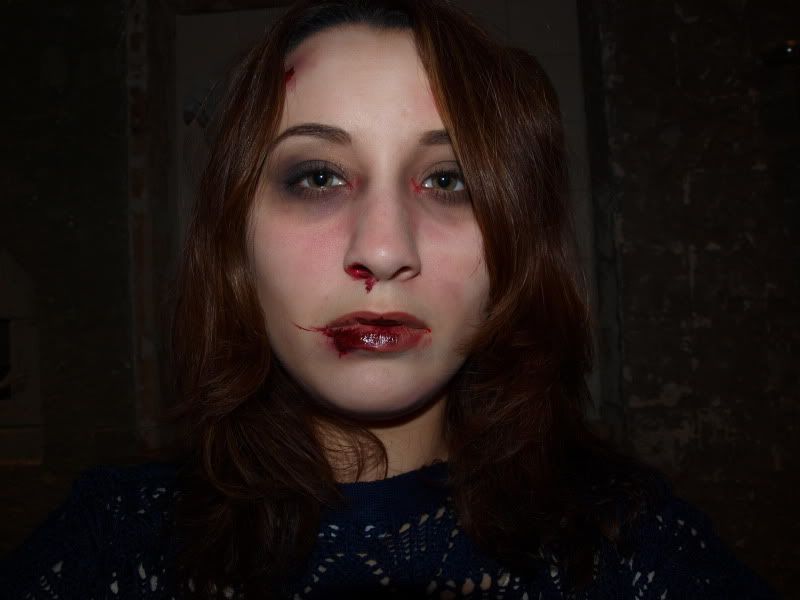
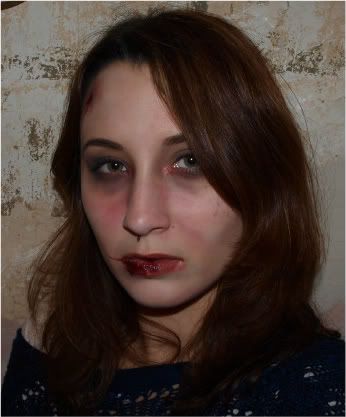
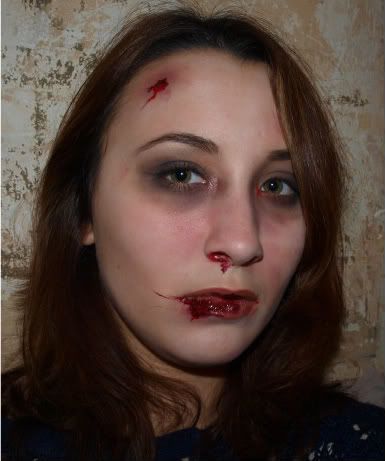
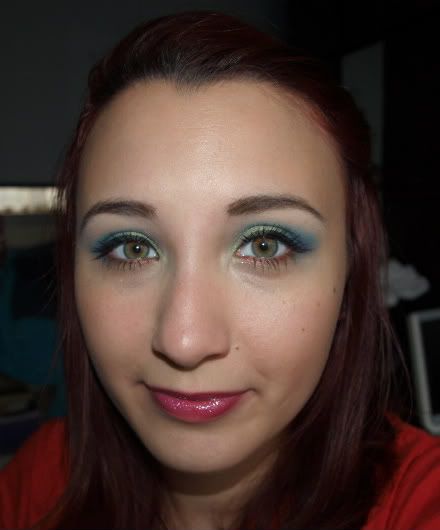
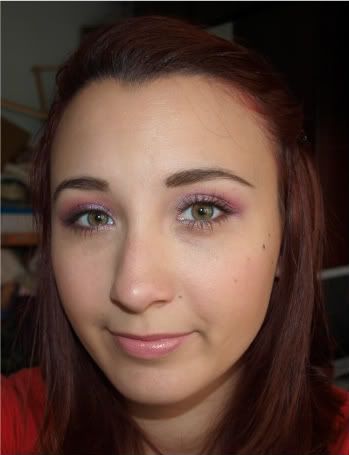
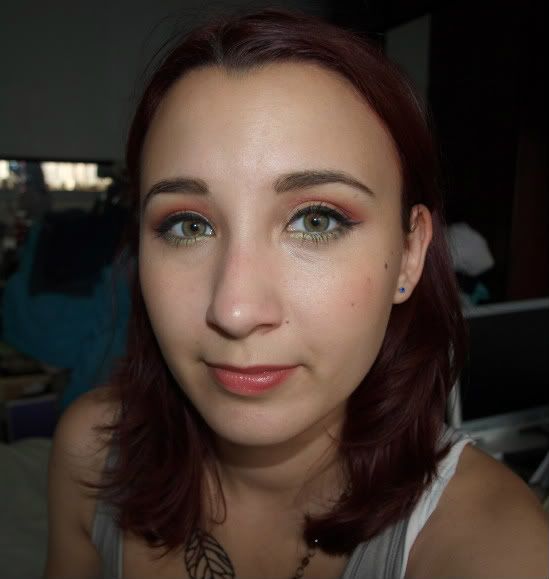
I think women from this era were just so classically beautiful. They always wore a red lipstick, often a dark red shade. Their eyeshadow drew out into a point to excentuate the eye, using a sultry dark grey or black. They would often bleach their skin and powder it white as this was a time before Coco Chanel popularised the sun tan. Blush was applied onto the apples of their cheeks in a doll like way and mascara swept through their lashes in an outwards motion towards the outer corner. I wanted to create a look which was inspired by these women but make it wearable for nowadays. My skin isn't as light as these women, my hair is longer and my eyebrows thicker (I'm not plucking them that thin!) so this is my take on it.


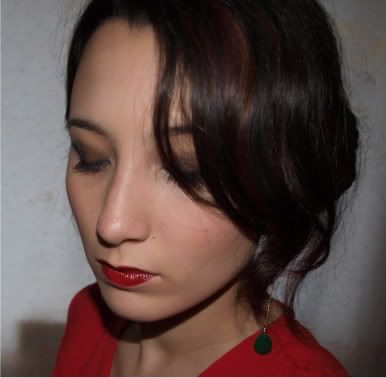
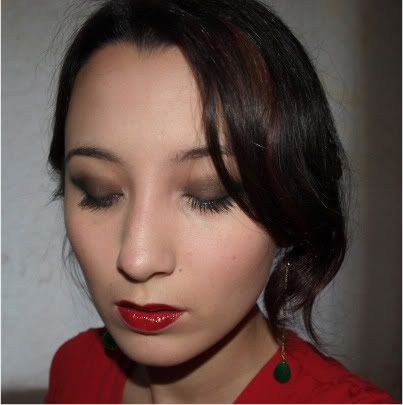
Face: MAC Studio Sculpt Foundation NC20 (a lighter colour could be used to make it more accuarate), Bobbi Brown Corrector (Light to Medium Bisque), Bobbi Brown Concealer (Beige), Collection 2000 Translucent Powder (I really powdered my face, much more than I would usually do to make it matte), MAC Oh So Fair Beauty Powder on apples of cheeks and then blended back lightly, MAC Plum Foolery blush stippled onto apples to make them brighter.
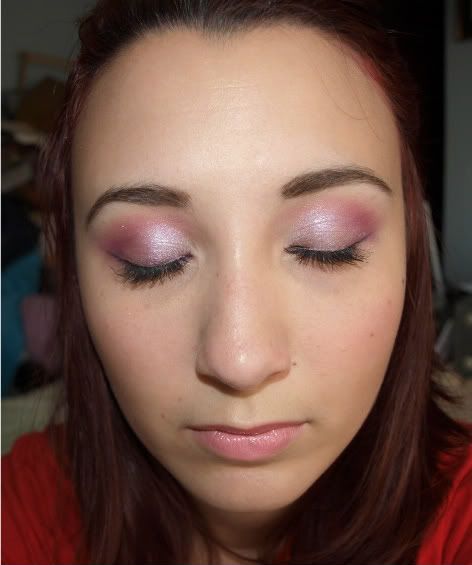
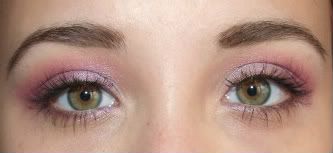
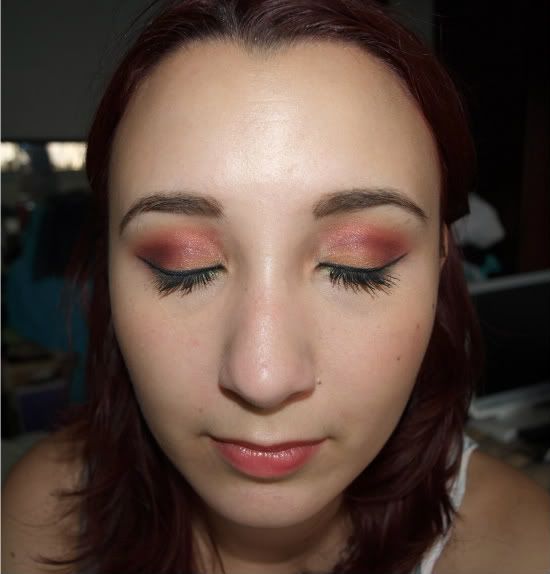
Eyes: MAC Carbon eyeshadow, Urban Decay Creep (ideally you would want a dark black matte eyeshadow but I only have Carbon and it is more of a soot colour.)
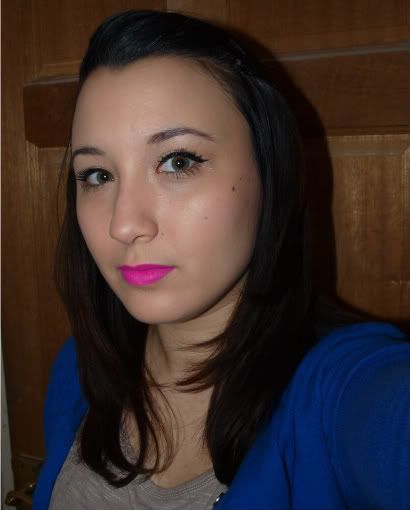
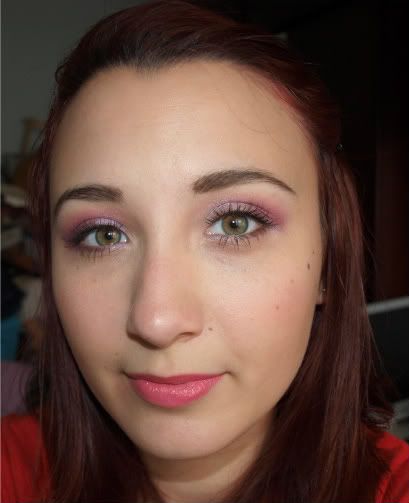
Lips: Illamasqua Sangers applied with a lip brush, slightly altering the shape of my lips to make them more pouty, MAC Love Peck applied with a brush over the top (the lips were darker in real life than shown here) and MAC Strut Your Stuff added to the centres to brighten them up.


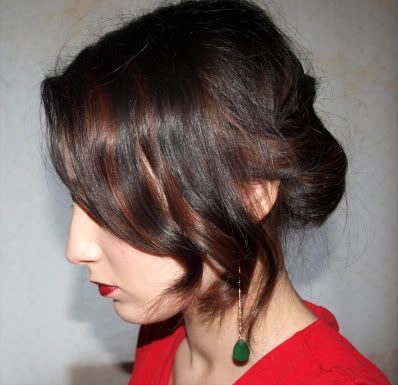
For my hair, I just washed and blow dried it then while I did my makeup, tucked it behind my ears so when finished it has a wave in it. Then I picked up the right side and twisted it around the back of my head, fastening as I went along then when I got to the left side I just twisted it back down to create a sort of false bun. I think I used about four grips in total so it was really easy to do.

- Jennifer

Tuesday, 18 January 2011

Purple & Green Sparkly Eyes

This is a look that from Temptalia which is inspired by the Disney character Maleficent using some of the MAC Venomous Villains collection. I loved that collection and have wanted to do this look for a while but only got around to it on Sunday when I went out for the evening with friends. I love the colours and it is really different to my usual makeup. I didn't use all of the products that Temptalia did, I had to subsitute a few things. You can view the original Temptalia version here, Christine looks fantastic wearing this look.

Products used:
Face - MAC Prep and Prime Face, MAC Studio Sculpt SPF 15 in NC20, Bobbi Brown Corrector, Bobbi Brown Creamy Concealer in Beige, Benefit Dandlelion on cheeks.
Eyes - MAC French Quarter Greasepaint Stick as base, MAC She Who Dares Mineralize eyeshadow (green side), MAC My Dark Magic Mineralize eyeshadow (violet on lid, dark purple in crease), Urban Decay Graffiti 24/7 eyeliner, Urban Decay Heavy Metal liner (silver), Bobbi Brown gel liner (black ink - to tone down the glitter), MAC Plushlash Mascara.
Lips - MAC Violetta Lipstick, MAC Revenge Is Sweet Lipglass

I really enjoyed doing this look and the eyeshadow wore really well over the greasepaint. The eyeshadows are some of the prettiest eyeshadows I've seen, the green looks really cool when used wet. I'd like doing this look again, it makes a change from my usual makeup although it is only suitable for going out in the evening for me.

Photos (excuse how large my nose looks in these photos - it isn't actually that big haha... also excuse the unfinished bathroom!)


- Jennifer


Related Posts Plugin for WordPress, Blogger...