Showing posts with label red. Show all posts

Wednesday, 18 April 2012

Pretty and Polished Swing

Today I have a special polish to show you, it is from an indie brand called Pretty and Polished which you can find on Etsy. The brand is owned by Chelsea and she has designed some amazingly gorgeous nail colours which are very unique compared to the mass market brands such as OPI etc. I have been waiting for her shop to reopen for ages and two weeks ago she opened again. I was very excited and stayed up late (Pretty and Polished is based in the US) to place an order so I didn't miss out. I ordered 8 of her mini sized lacquers and they arrived a few days ago. They are absolute stunners, I am so pleased with them. So far, I've only used one which I am showing today, it is called Swing.

Description from Pretty and Polished:
It don't mean a thing, if it ain't got that swing!
This is one Du-Wop of a polish! A red jelly base is home to different sizes of black, white, and silver glitter.


I think it is lovely. It is so different from other colours out there and I love the squishy jelly base. One of my colleagues said it reminded her of a trifle - she thought it looked like raspberry jelly with fruit in it. I've seen quite a lot of nail blogs creating what they call a jelly sandwich where they've used a jelly type polish and sandwiched some glitter between the layers. Swing is like an instant jelly sandwich manicure in a bottle.

The application wasn't as good as I'd have liked. It is quite a runny polish compared to most glitter polishes and the glitter slipped off the brush a lot. I found that putting the bottle upside down for a few minutes beforehand helped to get the glitter to the top so it was easier to get it out with the brush. It is best to do a coat and then scoop the glitter with the brush and dab it on with the second/third coats. I am wearing three coats here and there was no nail line visible.


A bottle of Swing costs $4.75 and contains 7ml of product. They can be purchased on the Pretty and Polished Etsy store here. Currently, Chelsea has no stock available but she says that she is hoping to restock on Sunday.

Jennifer xx

Wednesday, 14 March 2012

Ruby Red Glitter


So after I got fed up with the pearls on my nails after only a day and ended up picking them off, I was left with lumps of missing nail polish where they were. I was too lazy to repaint them completely so I put another coat of the red (Eyeko Saucy Polish) and added a layer of Deborah Lippmann Ruby Red Slippers. I loved this, it was so sparkly and pretty.

Here are some more pictures.


What do you think?

Jennifer x

Tuesday, 13 March 2012

Vintage Red Inspired Nail Art

I used to wear red nail polish a lot, I hadn't worn it in a long time so I felt it was time to wear it again. I wanted to something a bit different with it so added some nail pearls. I think it looks like old vintage pearl necklaces.


I didn't keep it on for long because the pearls were bugging me and a couple came off so I removed the rest.

Products used:
OPI Nail Envy
Eyeko Saucy Polish (2 coats)
Seche Vite
Nail Pearls
Another coat of Seche Vite to seal in the pearls.

Edit: I wrongly listed this red as Leighton Denny Indulgence but I've just remembered that it wasn't and I actually used Eyeko Saucy Polish - which I think is now discontinued. You could use any red however.

Jennifer x

Sunday, 26 February 2012

Leighton Denny Friends of Dorothy Collection

I am a HUGE Leighton Denny fan, I simply love his range and have the majority of his colours. They are a pleasure to work with, they glide on effortlessly, wear well and are super shiny. There is a new kit available on QVC called the Friends of Dorothy Collection, it is a collection designed by one of Leighton's QVC viewers for a competition to come up with a theme for a QVC exclusive collection. This was the winner, inspired by the Wizard of Oz which I think is a great idea.

There are four shades in the kit, a chunky rainbow party style glitter, a deep shimmery green with blue micro shimmer shot through it, a yellow cream and a red glitter with green glitter mixed in. It all comes in a nice box so would be a perfect present for any nail polish or Wizard of Oz fan.


The colours themselves are the same great formulation I expect from Leighton. I'm never disappointed with his polish. The green and yellow are two coaters. The glitters work best with three coats to make sure there are no gaps between the particles.

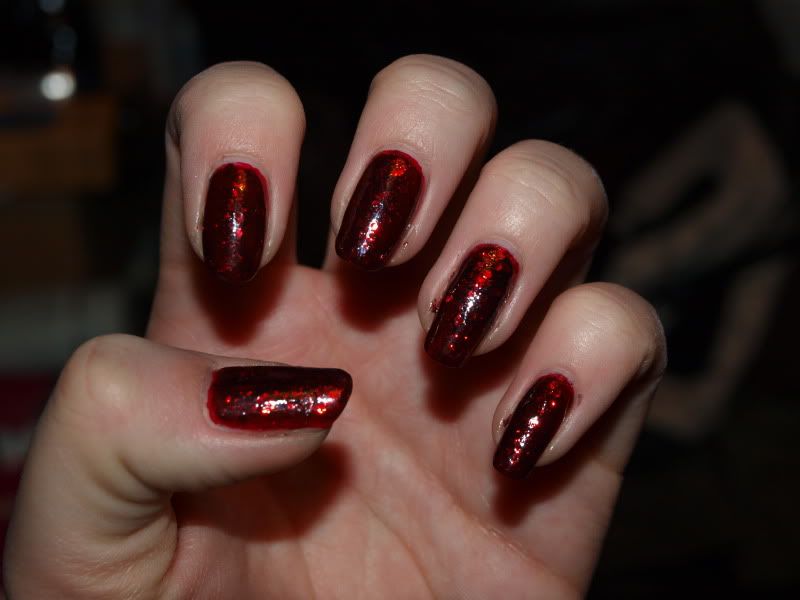
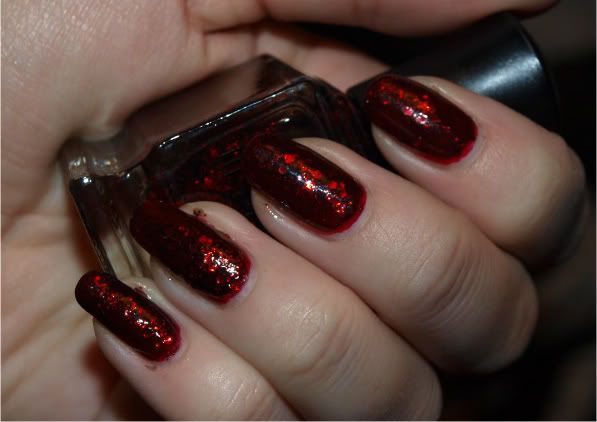
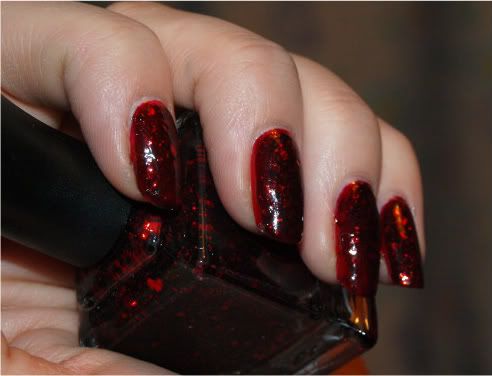
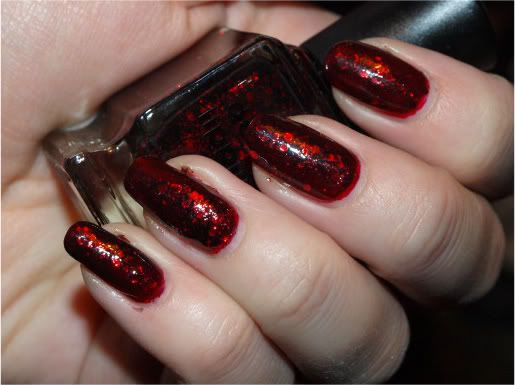
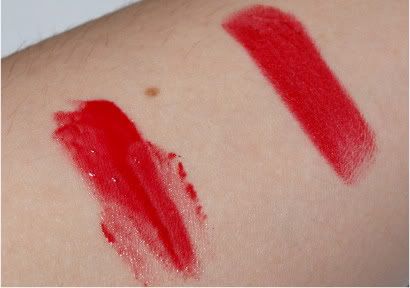
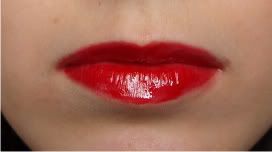
Ruby Slippers (red glitter) works as a full coverage glitter or can be used over another colour. It is not sparse however so it will still be quite dense over another shade so might be best to pair is with a red or even a green to go with the green glitter that is in it. Maybe a white or a gold would look good too. It would be a great colour for Christmas.


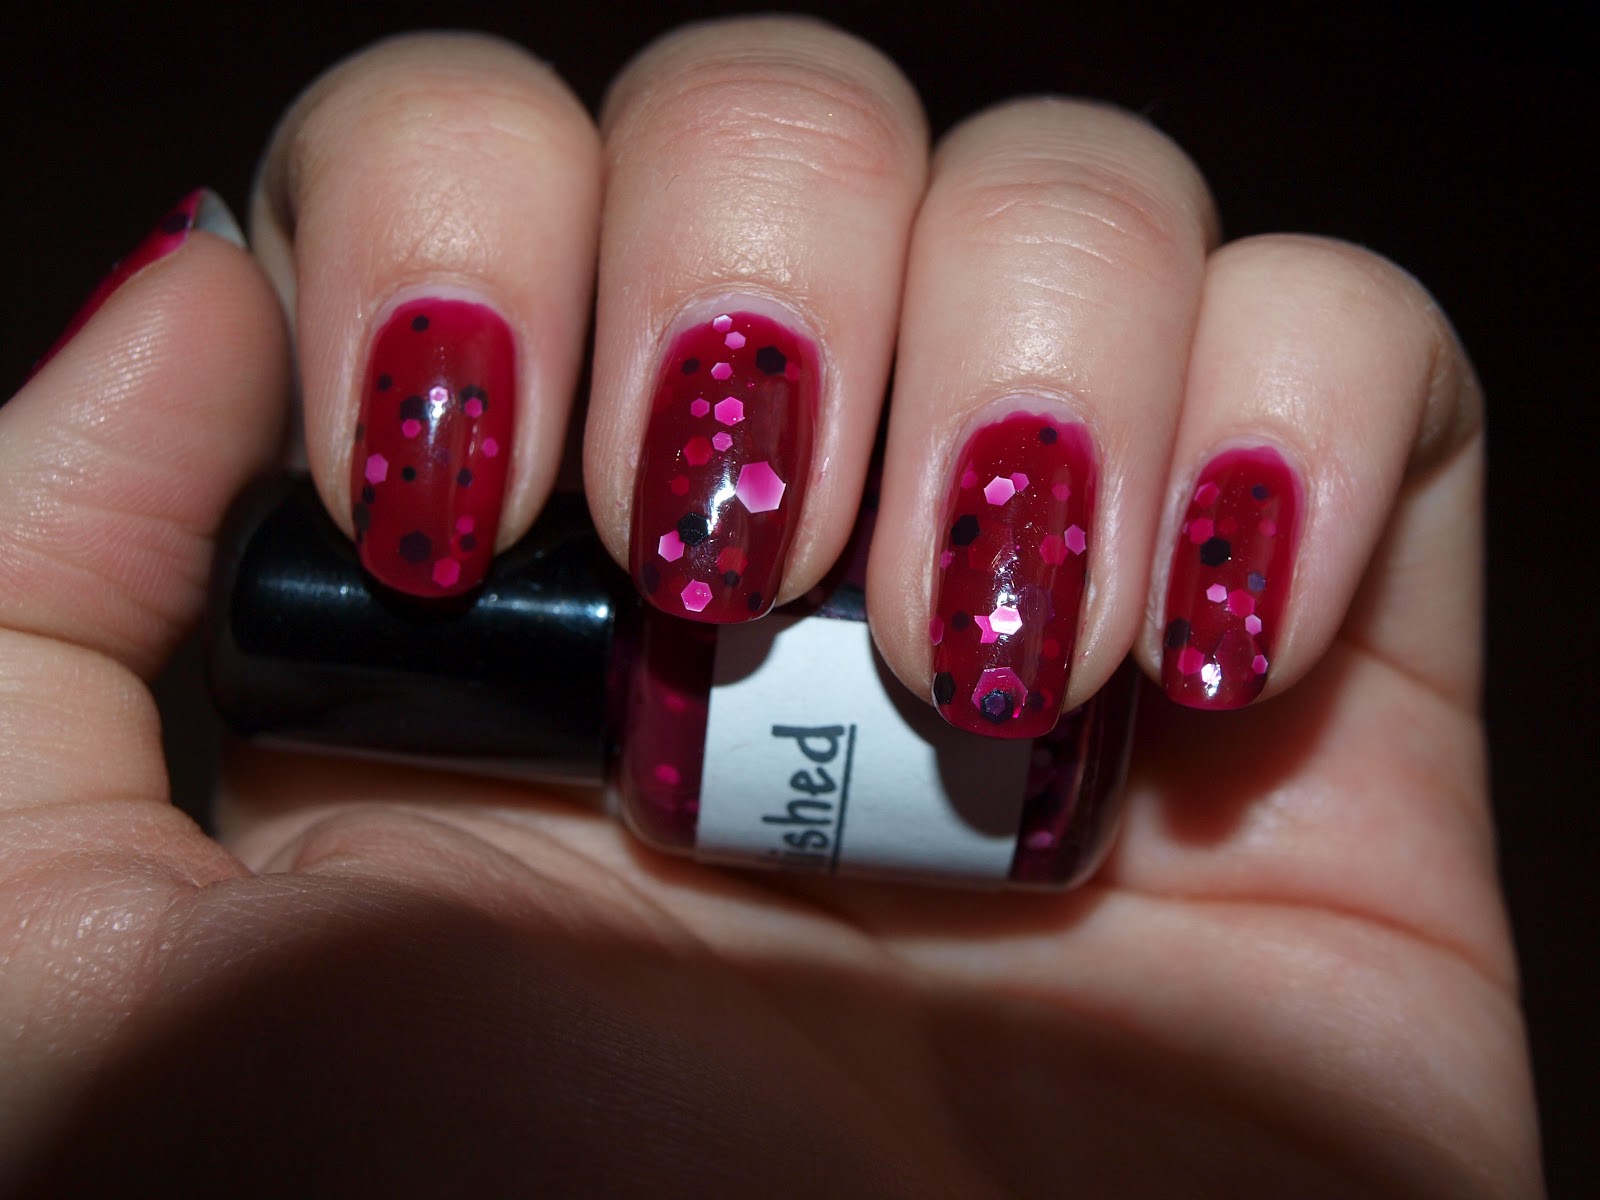
Over the Rainbow (rainbow glitter) is a little harder to work with, you do need to make sure it is dry between coats or you will end up dragging the coat beneath around. It is best to pat the glitter on and you can go to touch up any gaps at the end.  I didn't manage to get the glitter to stick to the tips of my nail because I was being inpatient so I went back later and added it there to get full coverage. It is very forgiving to would be good for ridged nails. It can also be used as a topper for other colours if applied thinly.


This is a little comparison between other multi coloured glitters I have.

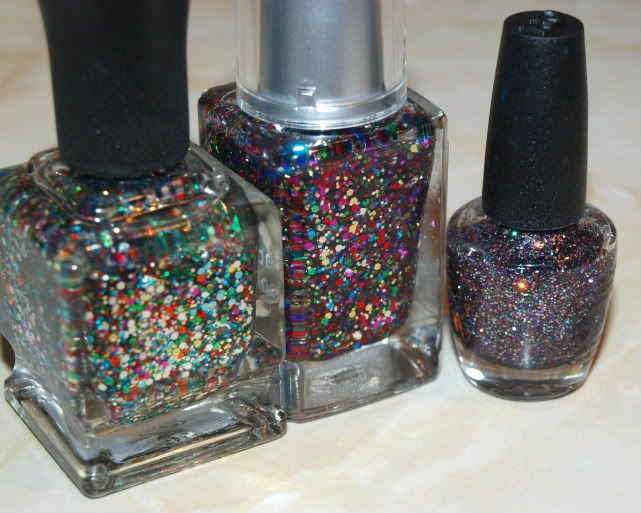
L-R: Deborah Lippmann Happy Birthday, Leighton Denny Over the Rainbow, OPI Mad as a Hatter
Emerald City (shimmery green) is my favourite from the collection. It is simply beautiful. You could get away with just one coat but I always use two for longevity and to get the full depth of colour.


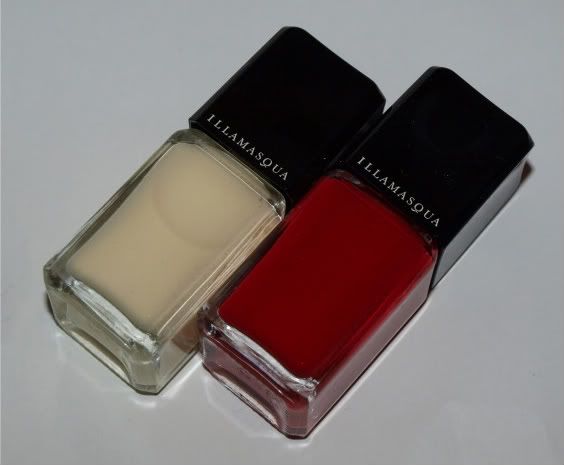
Brick Road (yellow cream) is a core shade in Leighton's line so can be bought at any time. This is probably my least favourite in the kit. I found it harder to wear against my skin tone. The awful manicure I did wasn't helping either. It is still a nice shade of yellow, it isn't too garish (think the shade of yellow that is hot dog mustard... ewww) is is more pastel but still remains bright. If you are familiar with Chanel's Mimosa, is it along the same lines of that but minus the shimmer. I think this would work better when I have a bit of a tan, it is definitely a Summer shade.


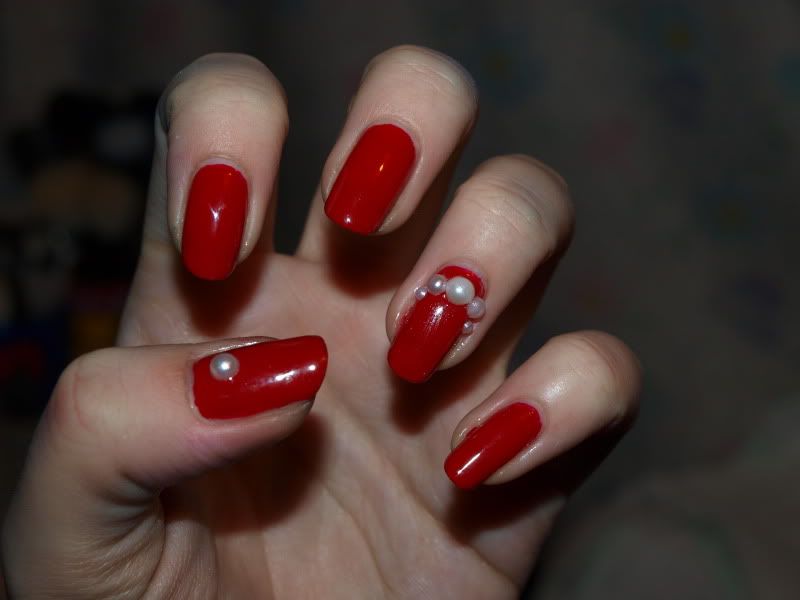
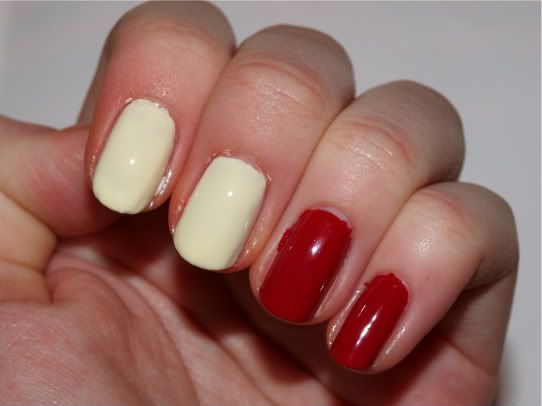
Here are a couple of manicures I've done with these shades. I liked the green and rainbow one but hated the yellow and red one, I removed it the next day :(


Jennifer x

Sunday, 20 March 2011

New hair colour and cut!

So my experimentation in the world of hair dye took another turn yesterday. The last time I had a hair cut (a couple of months ago) I had some bright red 'slices' put in. I liked it but after a while I wanted more lol! I'd wanted to go red for ages, I'm always telling my boyfriend about it and pointing out people with nice red hair. He just keeps telling me I should just do it, I'm sure he gets bored of the same conversation after a while but he doesn't need to listen to it again... well until I am bored and want to have a different colour!

So here it is!


I love it! It is a tad brighter in real life, I couldn't quite capture it on camera and ended up nearly droping it on my head as I had to half lay down on my bed to get decent lighting! It is also brighter in the areas where I had the slices from last time. I think it warms my skin up a bit more, I don't look as pale as I did with dark hair, yeah I know I wasn't exactly pale but I mean in contrast to my old hair colour. (Excuse the awful Forever Friends curtains behind me, I have had them since I was a baby and I think I've well outgrown them by now.)

- Jennifer

Wednesday, 2 March 2011

Illamasqua Throb Collection Review

Ugh, this has taken me forever to get up here but the collection is still available so at least you can still get them if there is anything you fancy. The only thing I didn't get was Scorn (matte black) as I just didn't fancy it.

First up, the nail polishes in Throb and Load.

L-R: Load, Throb
Load on index and middle fingers and Throb on ring and pinkie fingers
Both of these polishes are a cream finish, they have a nice texture for application and go on very smoothly. Load however is a little streaky and required a third coat to even it out, Throb only needed two coats (this is how I always paint my nails) but you could get away with one coat if you didn't have time for the second. I do recommend that you do two though to get the true depth of colour. The brush on these is nice, it isn't a wide brush like OPI but it is a decent length and applies the lacquer well. The bottles have a square cap but that comes off revealing a round cap underneath if you find it hard to use the square one.

Next is the lipstick in Sangers.


I really like this lipstick, it is a true red but seems to be slightly orange against my warm toned skin. It is a colour which should work for everyone which is nice to see. It is very pigmented and applies so well. I especially like the shape of the lipstick as it makes it easier to get my cupid bow perfect as it fits just right and it has a large surface area so I find it easy to sweep along my bottom lip. Obviously this shape wont stay there forever but it is nice while it does. I certainly think the shape of the product is better than MAC for application on my lips. I haven't worn this out yet but it does feel very comfortable on my lips which are actually very dry. I wouldn't say it was moisturising but it doesn't make them dry at all. I feels like it is staying in place - if you are familar with MAC's lustre or creamsheen finish lipsticks, they tend to feel like they move a bit if you press your lips together - this stays still but still gives slip to remain comfortable. It doesn't taste of anything to me but I do smell a hint of sweetness but not when it is on. I really like the black packaging of Illamasqua's products. I think they are very sleek looking and I like the 'knocked off' corners and slightly concave sides.

Finally Succubus Intense Lipgloss.


This is another true red product but again seems slightly more orange based on my skin tone. Illamasqua's intense lipglosses are supposed to be strongly pigmented and give true colour to the tube, however, this one seems sheerer than other shades I have seen. I also find it difficult to apply evenly - this may just be me though because I have seen other photos of it looking really good. I'd say use a brush with it because I personally hate the applicator. I find it clumsy and difficult to squeeze the right amount from the tube and get it on my lips evenly. I rather doe foot or brush applicators. I wore this out on Valentines Day for lunch with the boyfriend. I ate spaghetti and it was barely there when I had finished, with just a little around the edges and smudged bits around my mouth... in all fairness though, I had chosen a rather messy meal! It is very comfortable on and not incredibly sticky. For me however, this would be more of a layering product due to how I find application. I'd also say a liner may be needed in case of feathering, a matching red or a clear waxy liner would be perfect.

Lip product swatches...
L-R: Succubus Intense Lip Gloss, Sangers Lipstick
Sangers
Succubus
Sangers with Succubus layered on top
So, anything here catch your eye? I hope my lip swatches are better here!

- Jennifer
Related Posts Plugin for WordPress, Blogger...