Happy Halloween! Hope you enjoy whatever you're doing tonight. I don't celebrate Halloween but wanted to do some Halloween makeup. This is the first time I've ever done anything like this and I don't have any products such as liquid latex or spirit gum etc to do anything really creative so had to make do with what I had in my makeup collection. As per usual, I leave everything to the last minute and ended up doing this last night. I didn't know what I wanted to turn myself into and ended up making it up as I went along. I think it looks a little bit zombish although could have done with some more cuts and veins and rot haha - maybe next year.
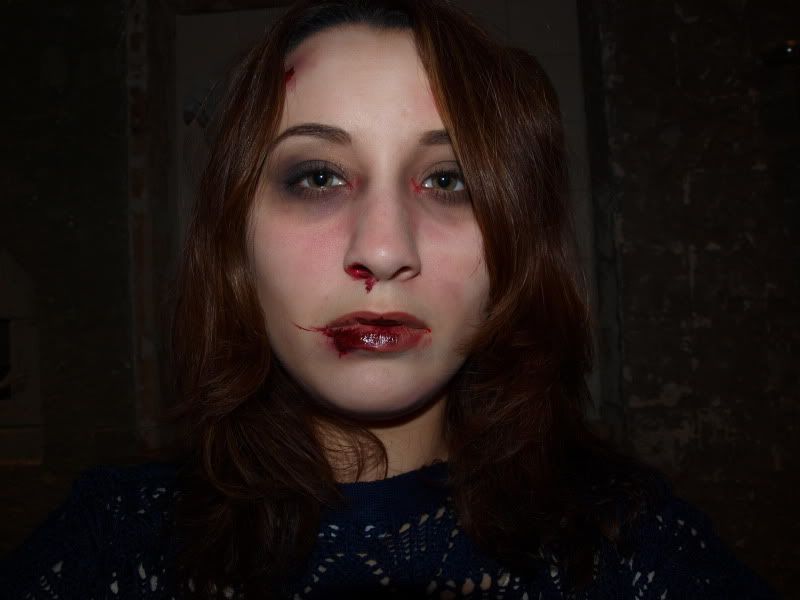
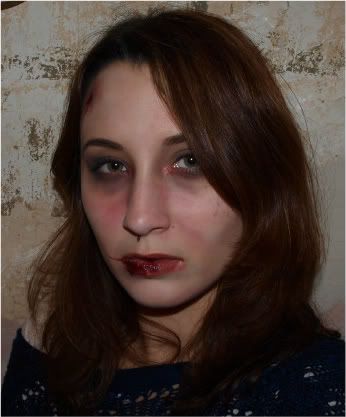
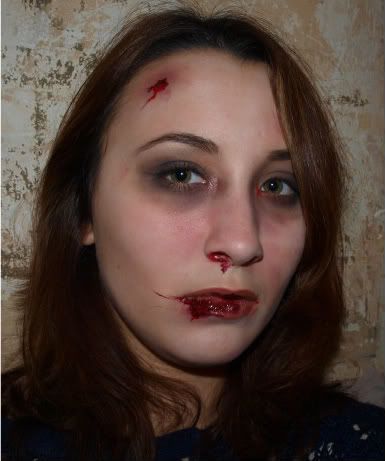
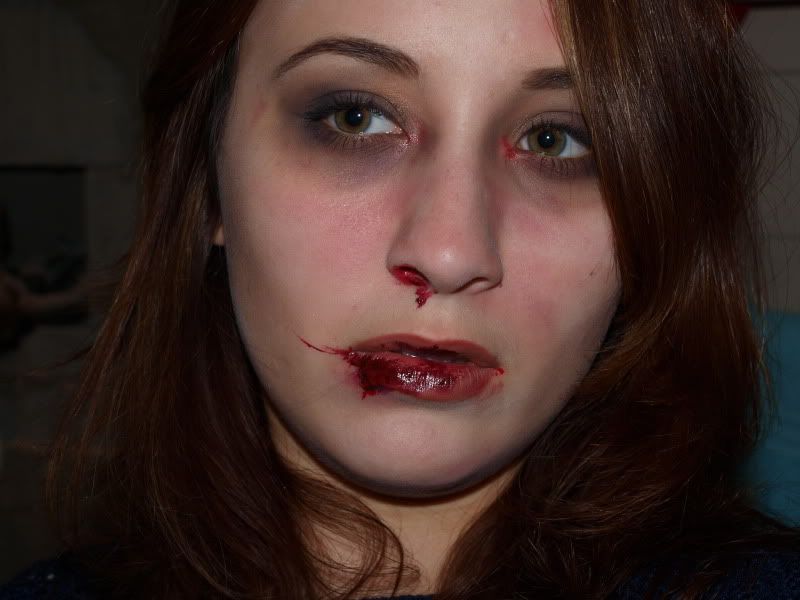
I already had my makeup on from the day, my eyeshadow was very neutral in skin tones with a tiny bit of shimmer. This was mostly covered up. Because I didn't want it to look perfect, I just added more on top of what I already had on.
What I used:
- White eyeshadow (MAC Gesso) applied all over with a small foundation brush, packed onto my skin and 'scrubbed' in to get it to look a little patchy. I couldn't find a very light foundation to use cheaply yesterday so made do with eyeshadow but you could use a light foundation instead.
- Taupe-grey eyeshadow as a contour on a round eyeshadow brush to sketch out the shape and then blend downwards. Soften with a fluffy contouring brush. I used MAC Copperplate through my cheekbones, around the top of the nose to add shadow and depth to the eyes and along the jaw bone.
- Brown-red eyeshadow under the eyes to make them look sore, I used MAC Folie. I also used this colour in areas where I wanted my skin to look bruised.
- Grey eyeshadow under the eyes and on the lids to make them appear deeper set. I used MAC Scene.
- Matte black eyeshadow all over the lid and underneath for a dead and smudged makeup appearance.
- Reddish plum purple eyeshadow, I used the one from Sleek's PPQ palette to use around the bruised areas to darken and deepen the look of the bruises, I also used it in areas around the mouth and also smudged the excess on the brush around the nose to make my skin look blotchy.
- MAC Cream O Spice lipliner all over lips, use something brownish.
- For the blood I used MAC's Kissable Lip Colours in Love Peck and Strut Your Stuff. Fake blood would be ideal, liquid and gel based would give the best effect.
I also did a Halloween nail design.
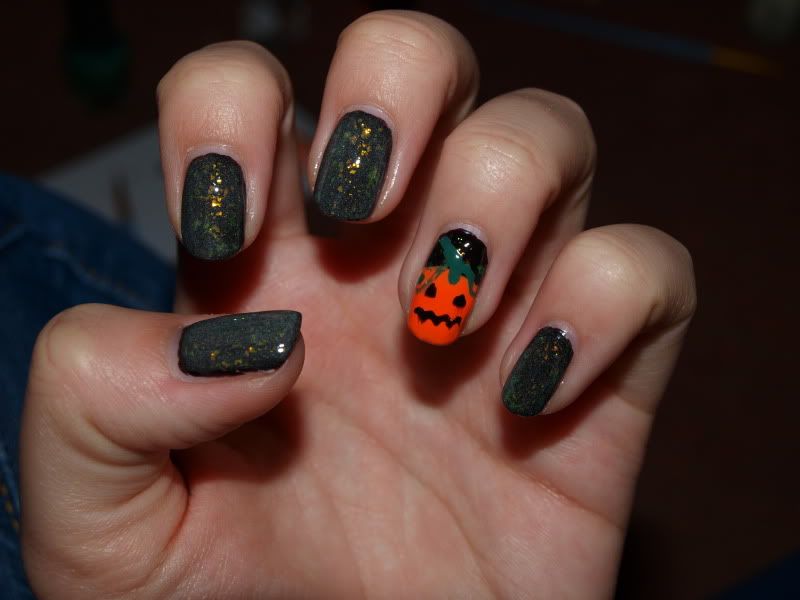
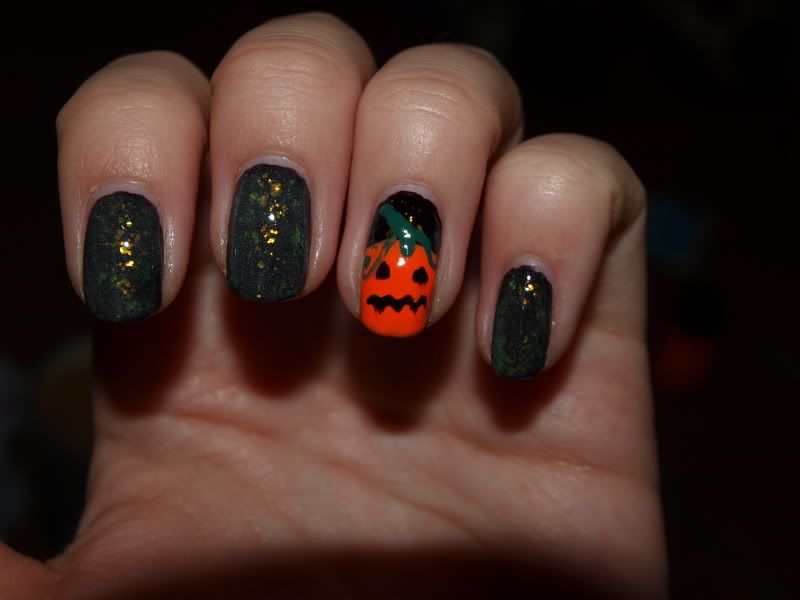
I already had the base colours on for this, they are one of the new Nails Inc Gossip Girl kits (the Lily set). It is a deep plum black creme finish with a flake polish on top which flashes red-orange-green. I added China Glaze's Ghoulish Glow (glow in the dark nail polish) over the top of all fingers except the ring fingers. I used Illamasqua Gamma (neon orange) for the pumpkin and OPI Jade is the New Black (medium green creme) for the stalk and swirly leaves. I then added the face in China Glaze Liquid Leather (black creme).
I wasn't able to get a photo of the polish glowing in the dark, my camera just wouldn't pick it up, I probably need to figure out the correct settings. It is subtle but does glow. It needs to be in the light for a while to 'charge', it will eventually fade out and not glow, just like children's glow in the dark stars do. It also mutes the colour down but I like it for this as it makes it a swampy greenish colour.
Enjoy your Halloween!
Jennifer xx
