Showing posts with label Nail Art. Show all posts

Wednesday, 31 October 2012

Happy Halloween!

Hope you are all having a great Halloween if you celebrate it. Here are the nails I did for the occasion.


Colours used:
China Glaze Liquid Leather
Barry M White
Barry M Red
Essie Orange It Obvious?

Jennifer xx

Thursday, 12 July 2012

Leighton Denny - The Heiress

 This is what I have on my nails at the moment. I wanted to use creme colours as I'd worn a lot of glitter recently but still wanted it to be fun. I haven't done any stripes for a while either and last time I did them my hand wasn't as steady as it is now painting nails. I picked out one of my favourite Leighton Denny colours, The Heiress which is a beautiful purply-lilac with some dusky blue in it. On the Leighton Denny website, it is described as 'a blue-belle purple' which I think is very fitting. For the stripes, I didn't have anything in mind other than using black and white so I just made it up as I went along.

The lines aren't perfect but I am pleased how it turned out and it is probably one of the best manicures I've done for myself :)

These photos are more colour accurate with some editing (purples are so hard to get colour accurate with digital photography).


What I used:
Leighton Denny Under Cover Base Coat
Leighton Denny The Heiress - 2 coats
Rio Nail Pens (black and white)
Seche Vite Fast Dry Topcoat.

Jennifer xx

Wednesday, 13 June 2012

Pink and Blue Leopard Print Nails

I saw these pink and dark blue Barry M polishes in Superdrug and really wanted to use them together in some nail art. I was going to do stripes but then decided to add the other blue in and do some leopard print. I've never freehanded leopard print before and this isn't great - it looks more abstract than leopard print. I liked it all the same though, I really love the colours together. It is so bright and fun. I didn't want to take it off but had to because I cracked my thumb nail and needed to fix it :(


Colours used:
Barry M Flamingo (pink)
Barry M Turquoise (light blue)
Barry M Indigo (dark blue)

Jennifer xx

Monday, 4 June 2012

Happy Jubilee Weekend Nails!

Happy Jubilee weekend to all my fellow Brits and all the other countries in the Commonwealth! I hope you are enjoying the festivities to celebrate Queen Elizabeth II's Diamond Jubilee year. I think it is a great achievement, 60 years as our monarch is a bloody long time and only Queen Victoria has got there before.

Here are my Jubilee nails to mark the occasion :)


My messy right hand
What I used:
White: Leighton Denny Pure White
Glitter: Nails Inc Jubilee 3D Glitter
Navy (pinkie) Barry M Navy
Gold for diamond: Barry M Gold Foil
red and blue Rio nail pen stripers for Union Jack flags

Jennifer xx

Thursday, 24 May 2012

Green-Blue Gradient Nails


Gradient nails have been on my to do list for a good while now and I've finally got around to trying it. I really like the way it came out. To do it I applied the lightest colour and then dipped a makeup sponge into the next darkest colour and sponged it onto my nails. I repeated with each colour until the darkest colour making sure that they blended together. It's not perfect but I think it looks good for a first attempt.


The colours I used were (in this order):
OPI Gargantuan Green Grape for the base colour
OPI Mermaid's Tears
OPI Fly
OPI Ogre The Top Blue


Jennifer xx

Friday, 4 May 2012

A couple of Spring Nail Designs


Sometimes it is nice to just experiment and practise on a nail wheel instead of having to do all of your own nails.

Base colours used: blue = China Glaze For Audrey, pastel pink = OPI Princesses Rule. All other colours are from Rio nail pens.

Jennifer

Thursday, 29 March 2012

Viva La Nails

Hi everyone, hope you are all okay. Sorry for being away for a few days, I was staying at my boyfriend's house  for his birthday and for some chill out time away from work.

This is a little view on an online store I'd been eyeing up for a while called Viva La Nails. They sell all sorts of nail products for both professional technicians and at home use. They have so many things that I've wanted to try so I decided to place an order. I also received their press pack containing some nail stickers and water decals, both of which I'd been curious about.

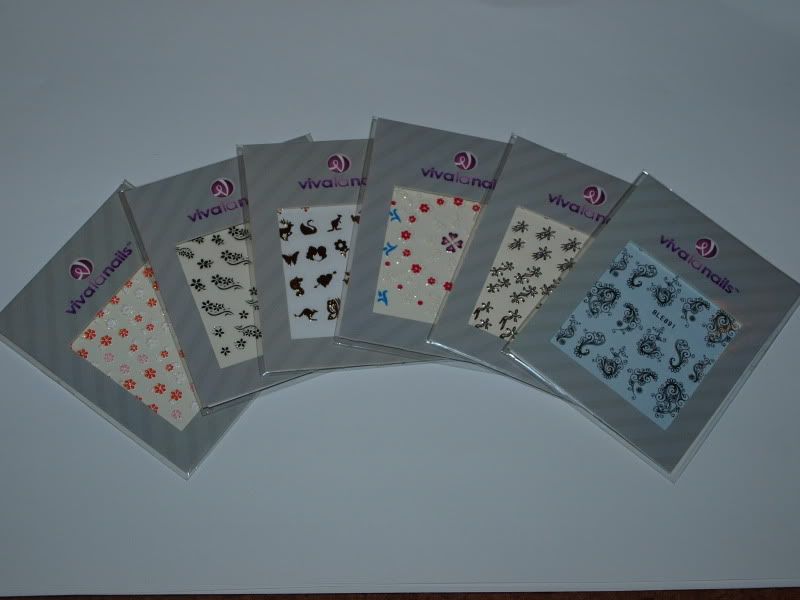
Here is what they sent me:

As you can see, there are some really nice designs there. My favourite is the one on the far right which is a water decal sheet. The others are all stickers. I've tried out one of the sticker sheets so far and the water decal sheet. When I use the others, I will post some pictures of what I use them for.

The stickers are quite tiny and a bit fiddly to pick up with fingers so a pair of tweezers or some sort of pointy object such as a cocktail stick to pick them up with is essential and it will also help to place them more accurately. I found that the sticky on the back of the stickers was not particularly strong so a topcoat is needed to get them to stick longer - having said that, it does allow them to be repositioned before adding topcoat. I think they need a bit of practise when applying them to yourself too because I had a few come off because I hadn't stuck them down properly so the edges lifted. It would be so much easier to apply them to another person. They may even work better with something like a gel coat over them if you do nails professionally. But as always, practise makes perfect so hopefully I will find the next sticker manicure easier now that I know what was wrong with my application.

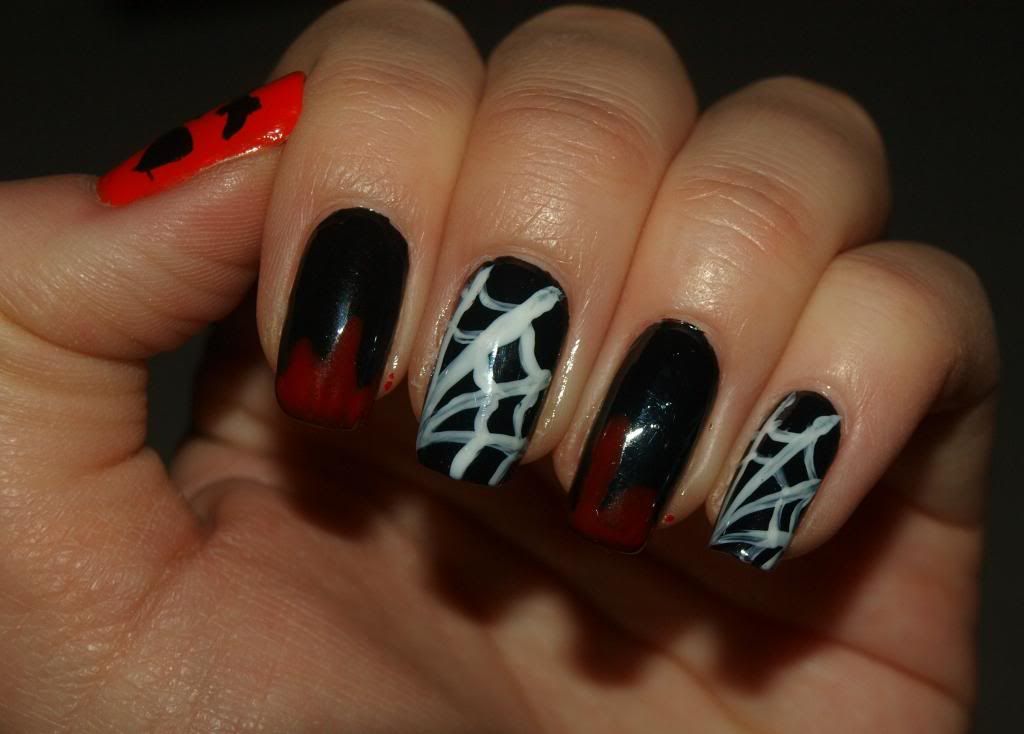
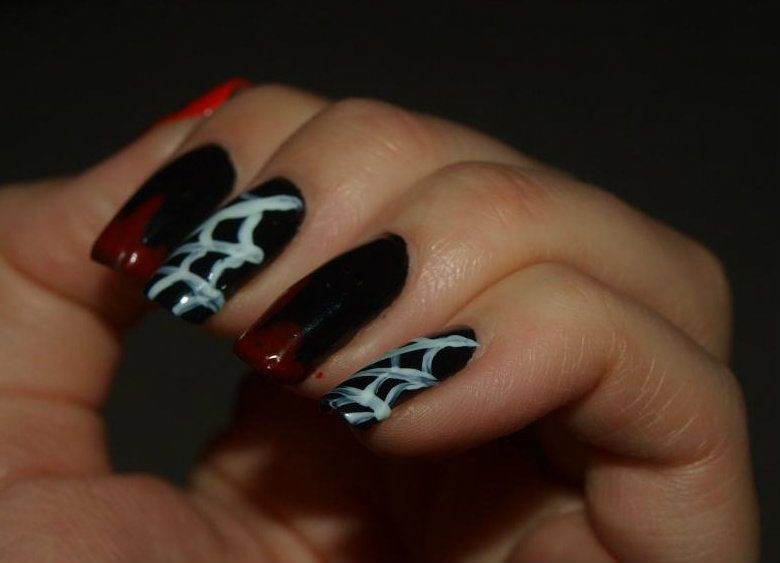
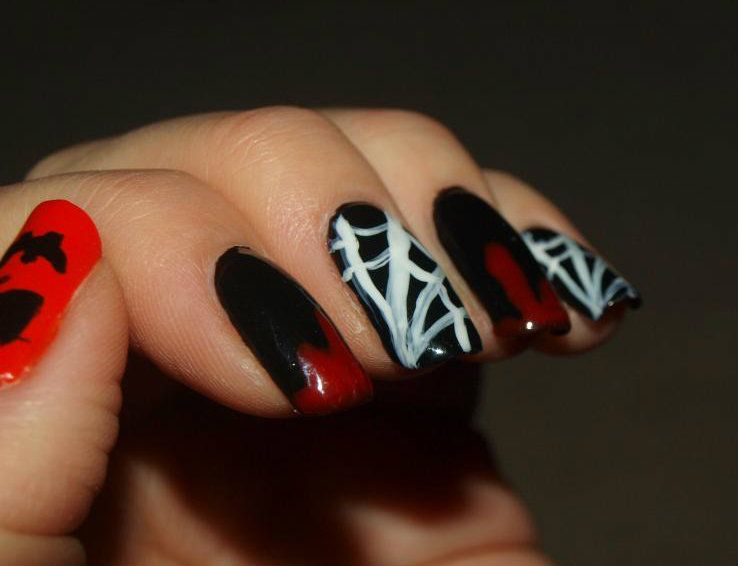
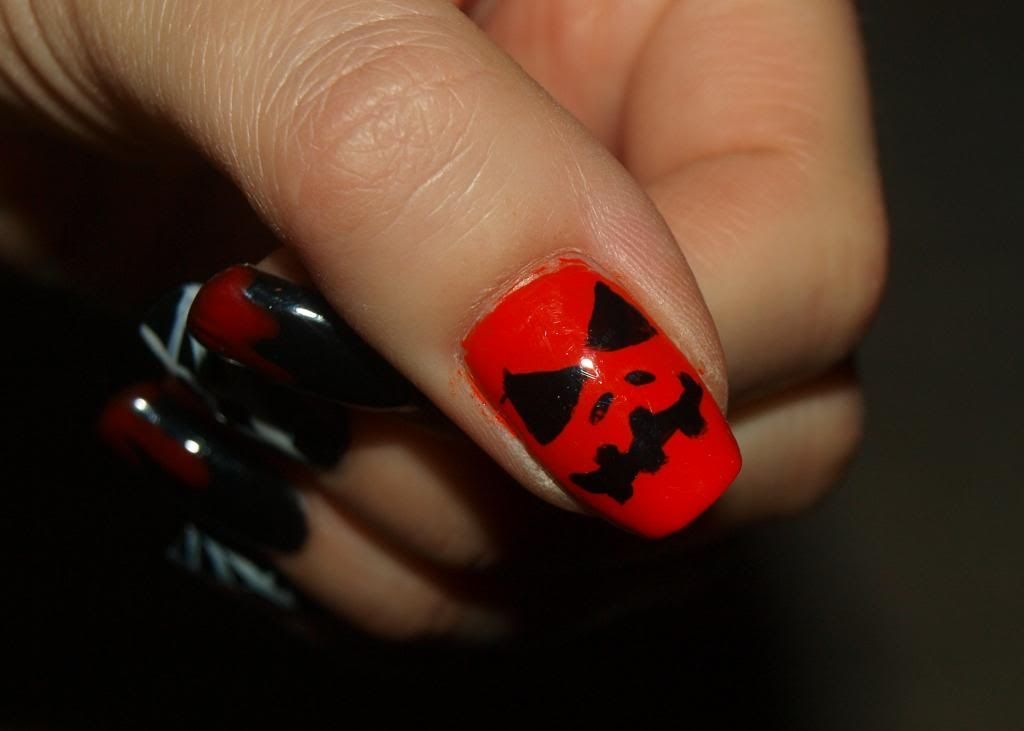
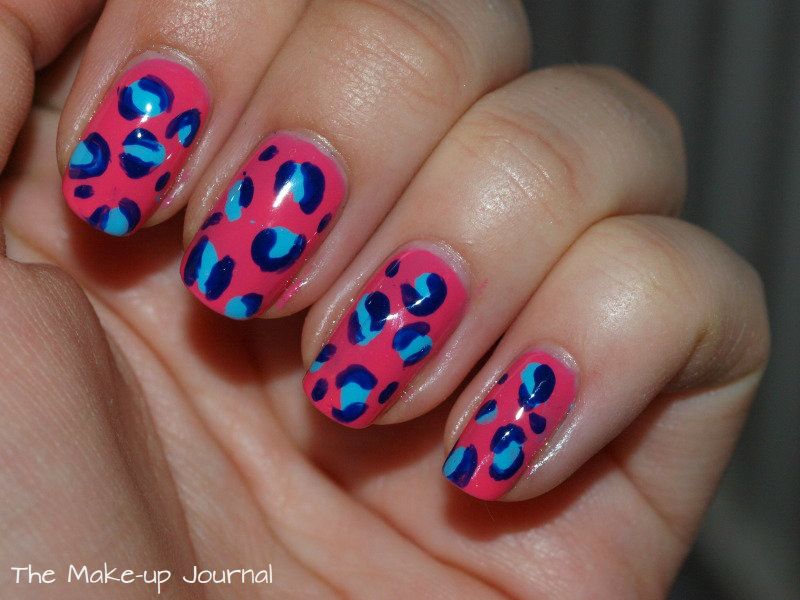
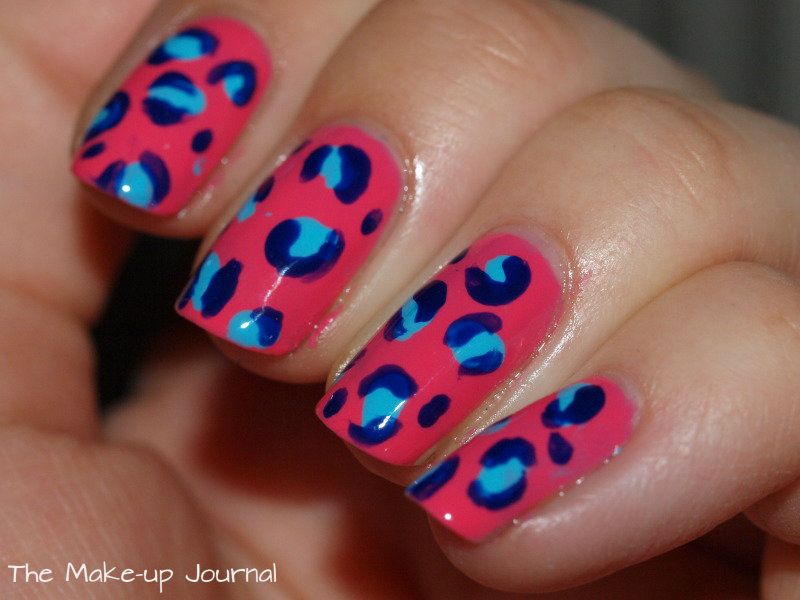
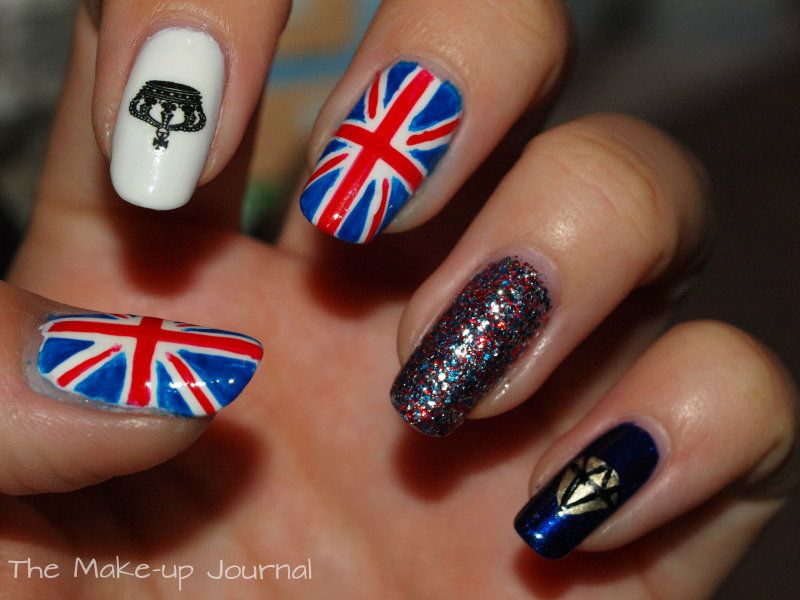
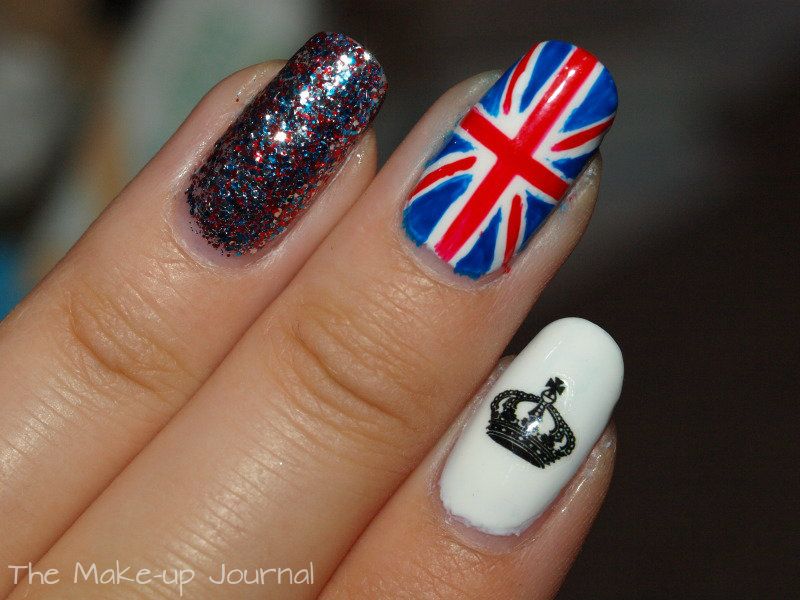
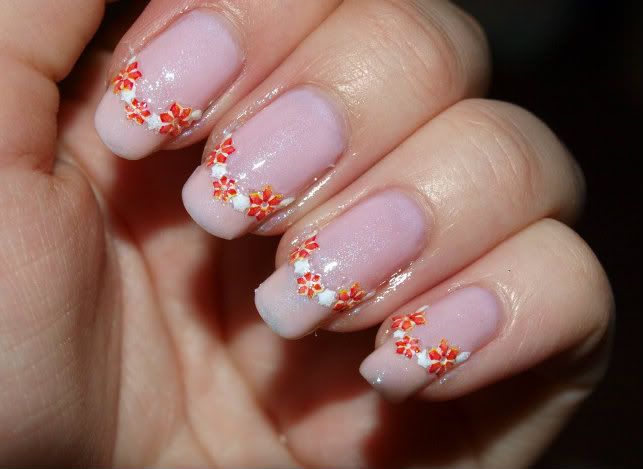
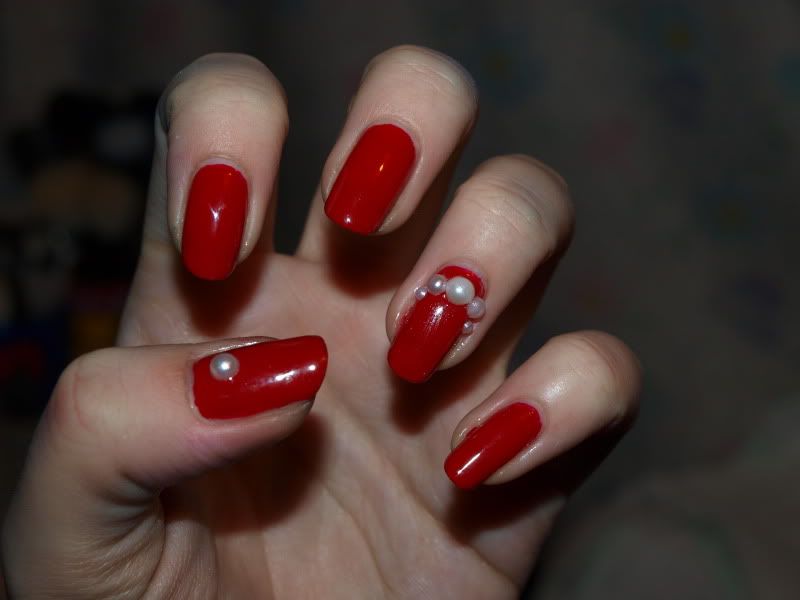
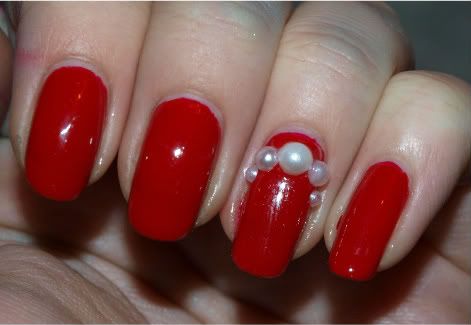
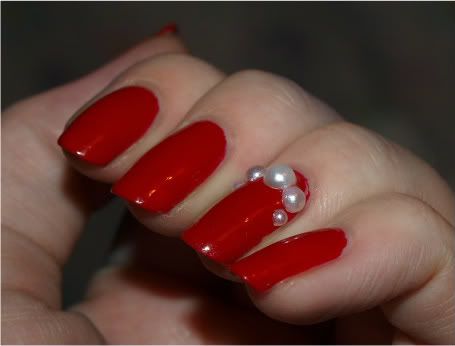
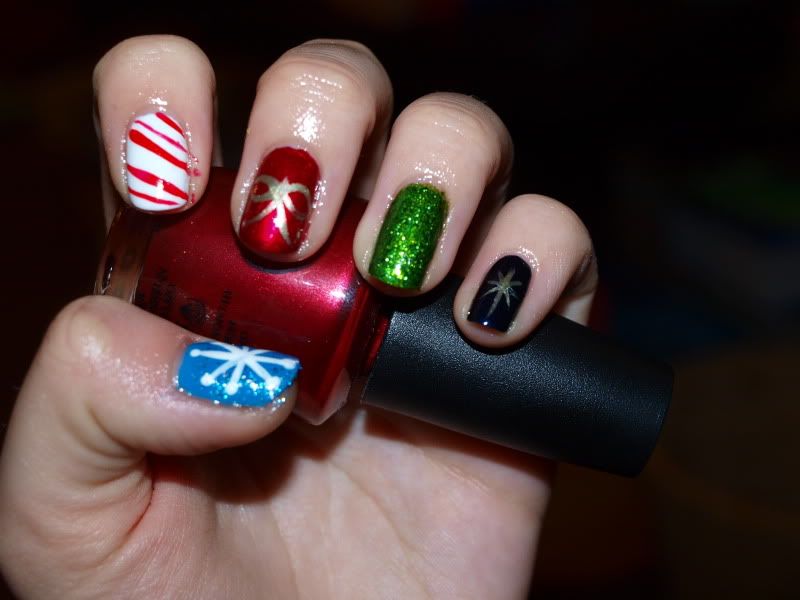
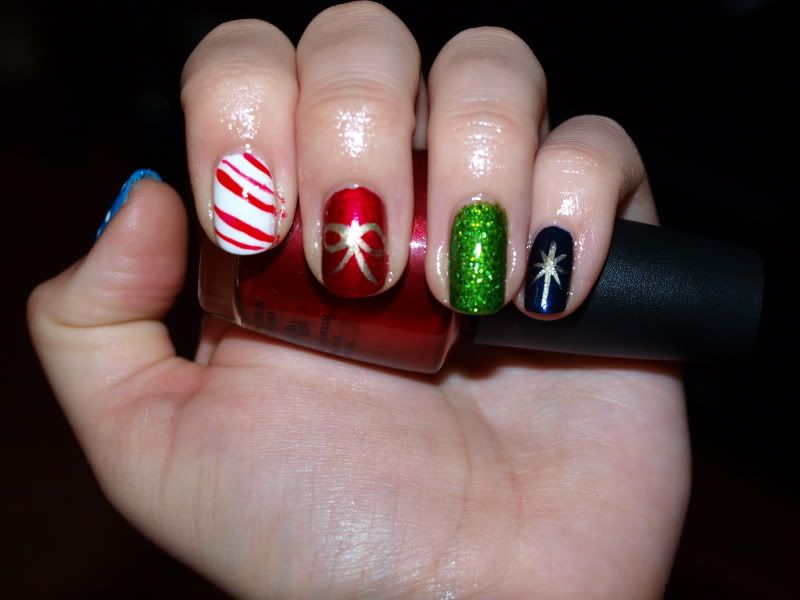
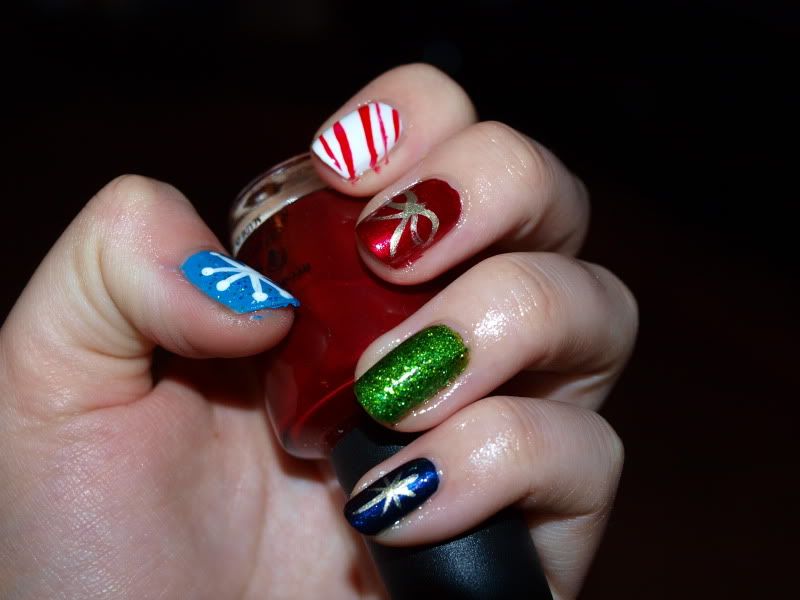
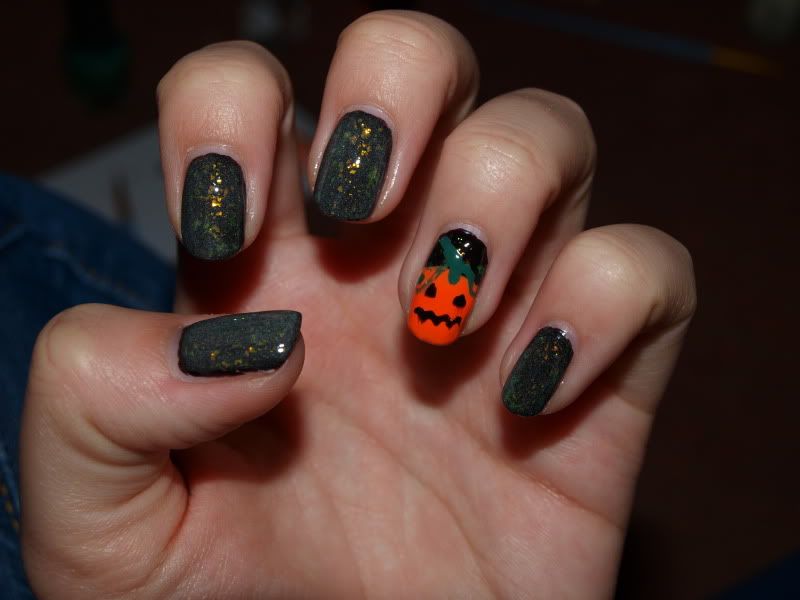
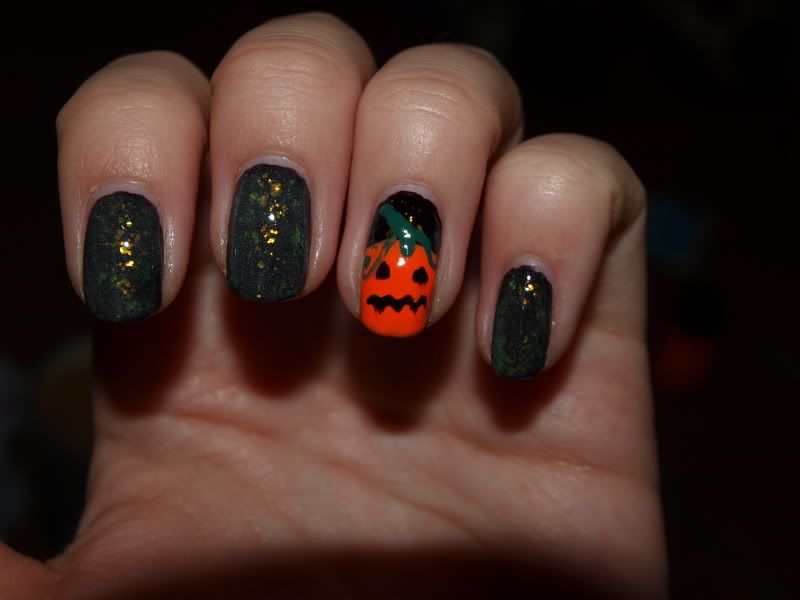
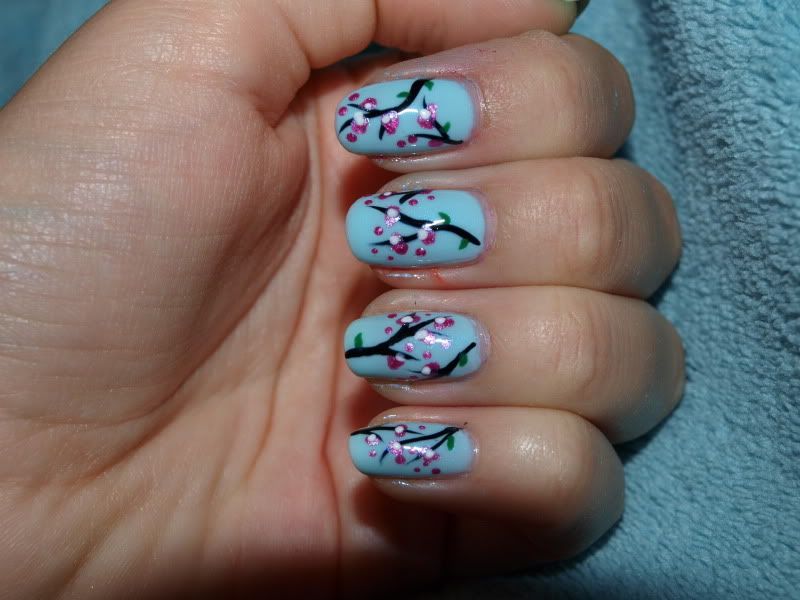
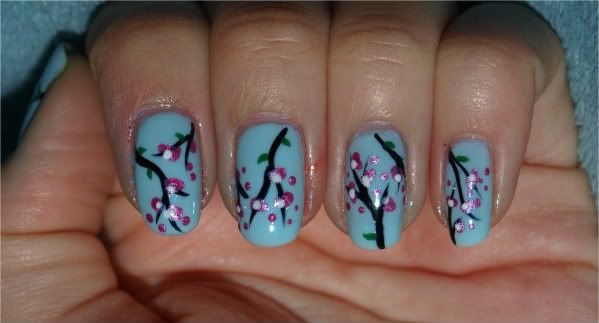
Here is what I did with them:

I used a base of Nicole by OPI Kimpletely in Love (from the Kardashian Kolor collection).
Then I used three stickers on each nail to create a french tip shape.
Lastly I sealed it all with topcoat.

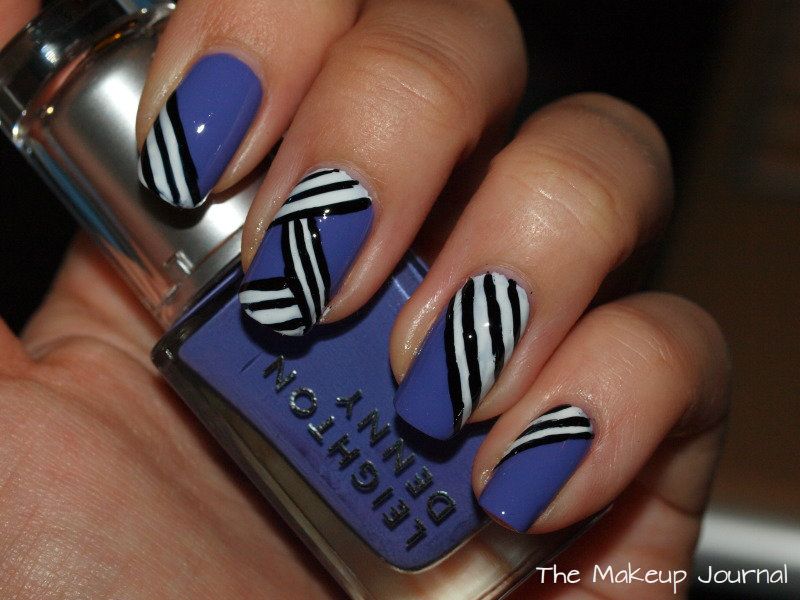
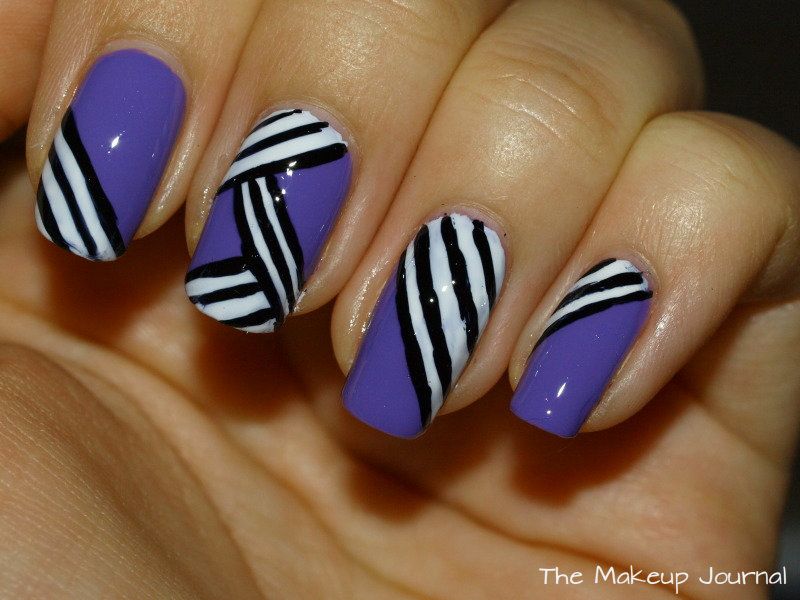
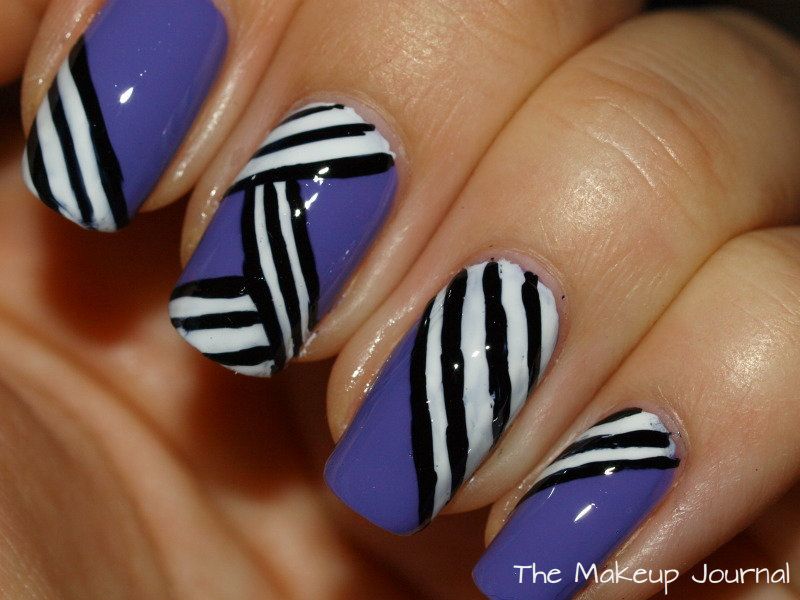
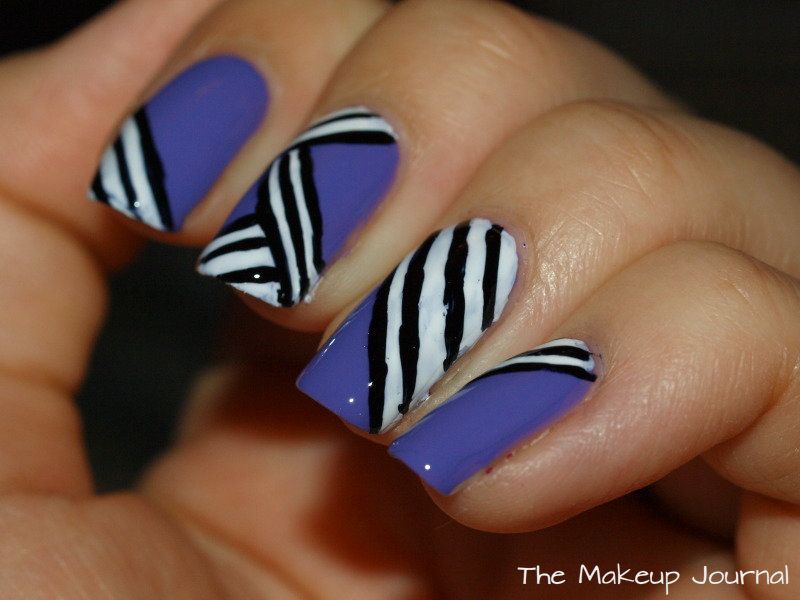
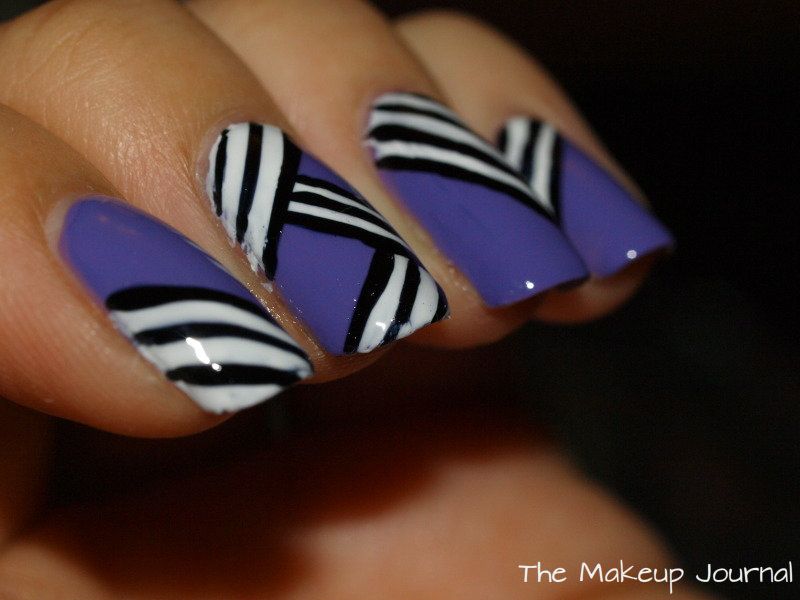
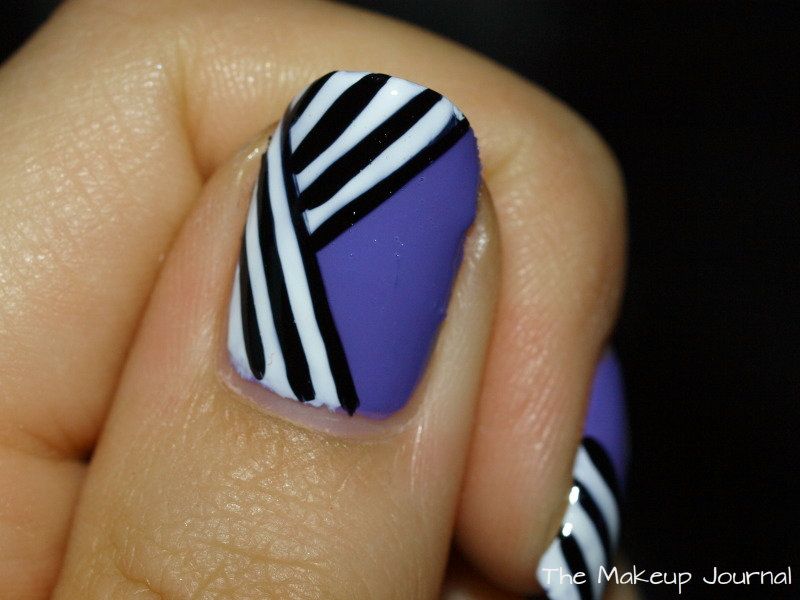
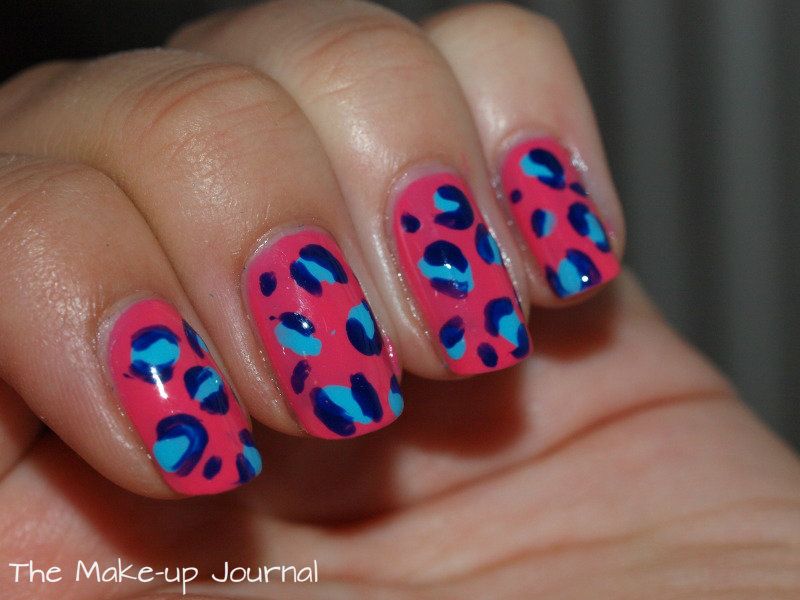
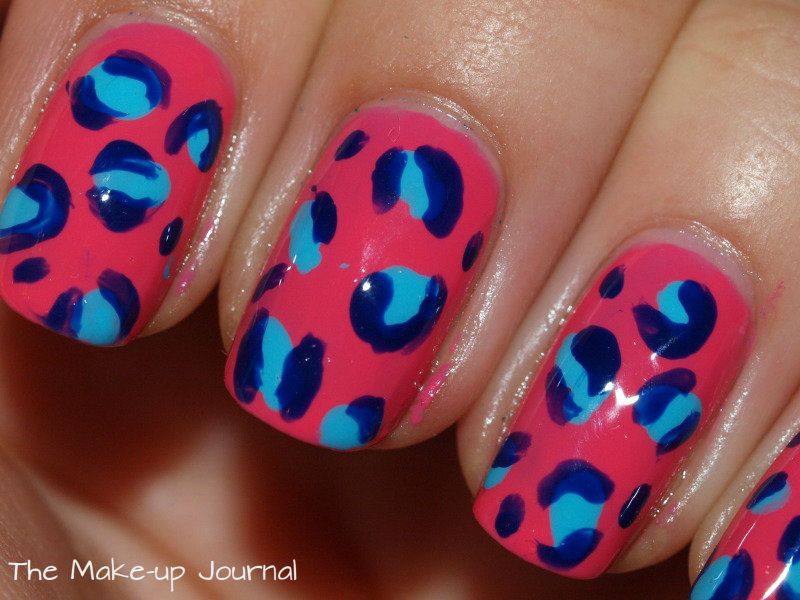
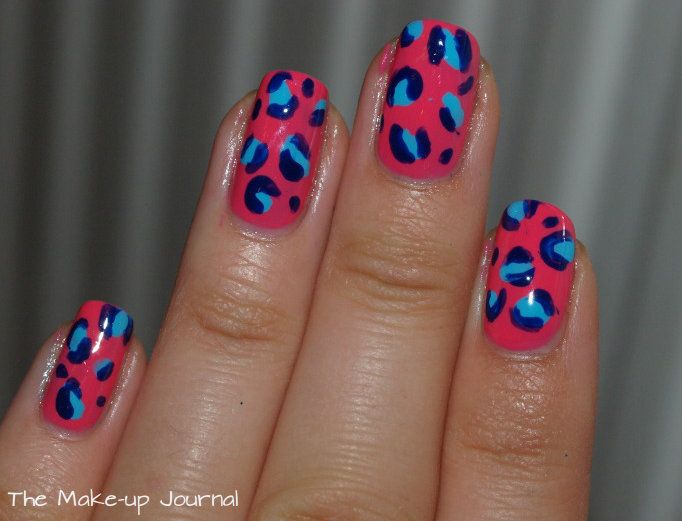
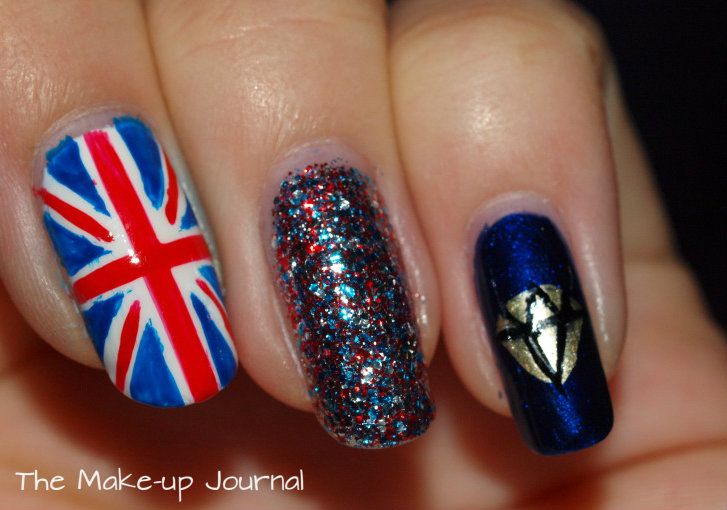
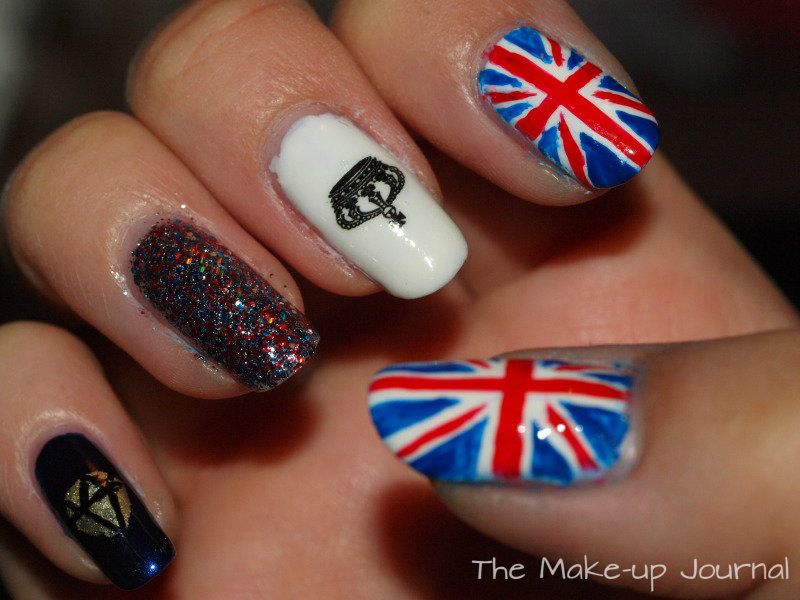
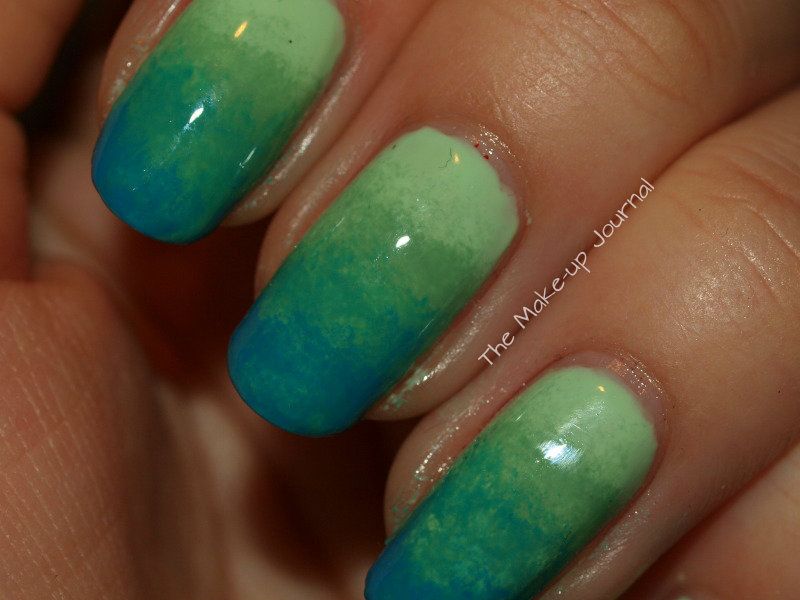
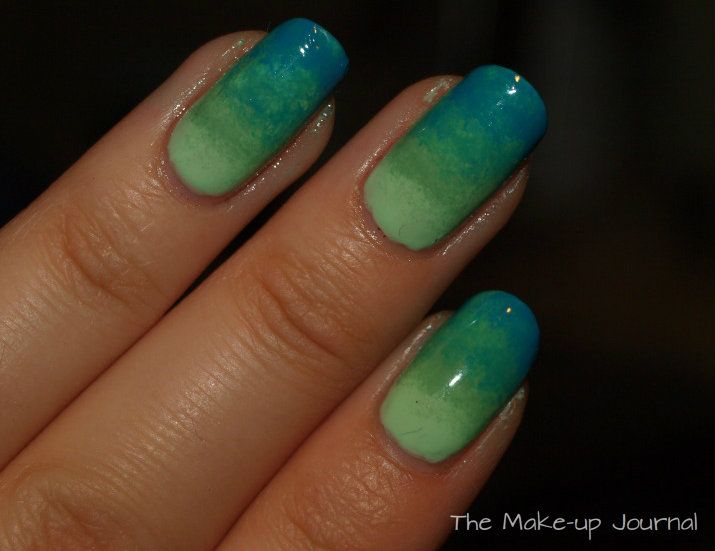
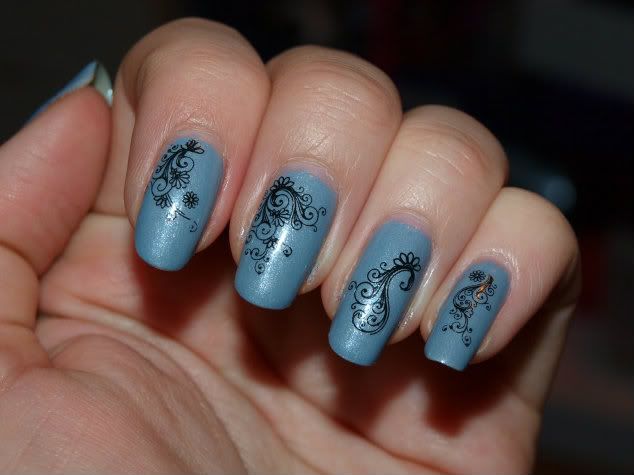
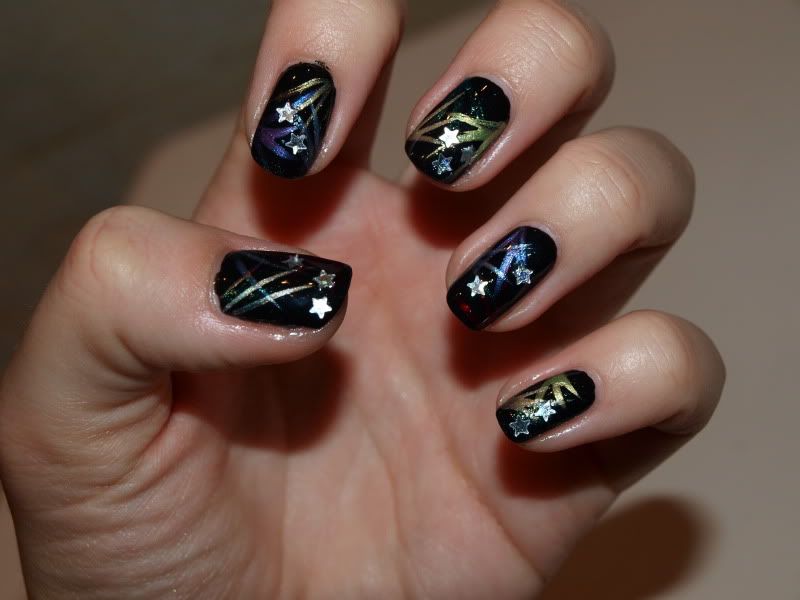
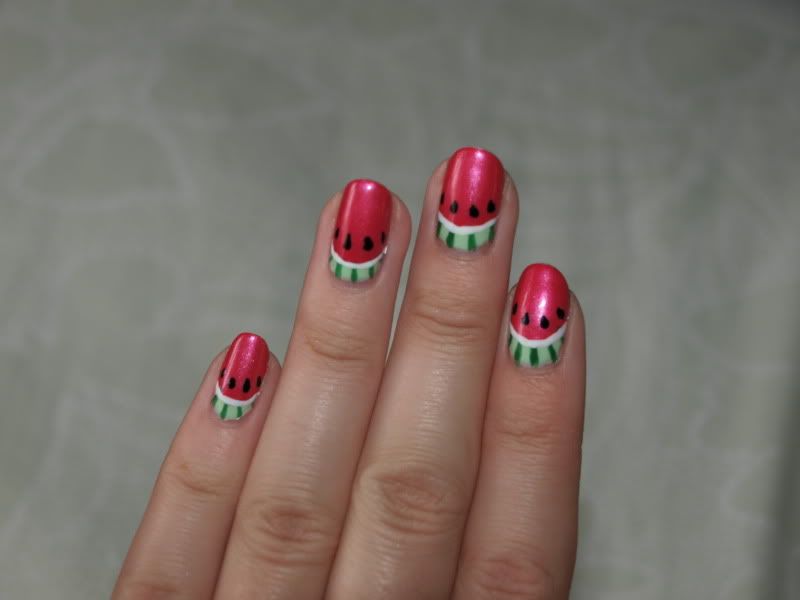
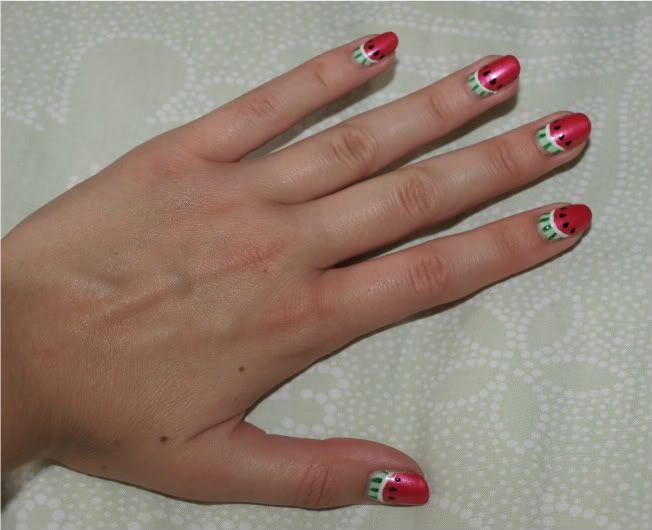
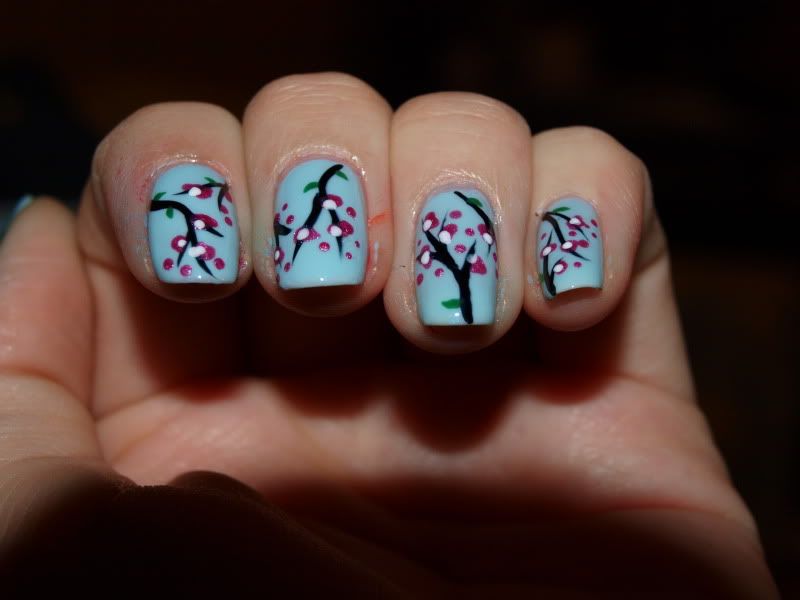
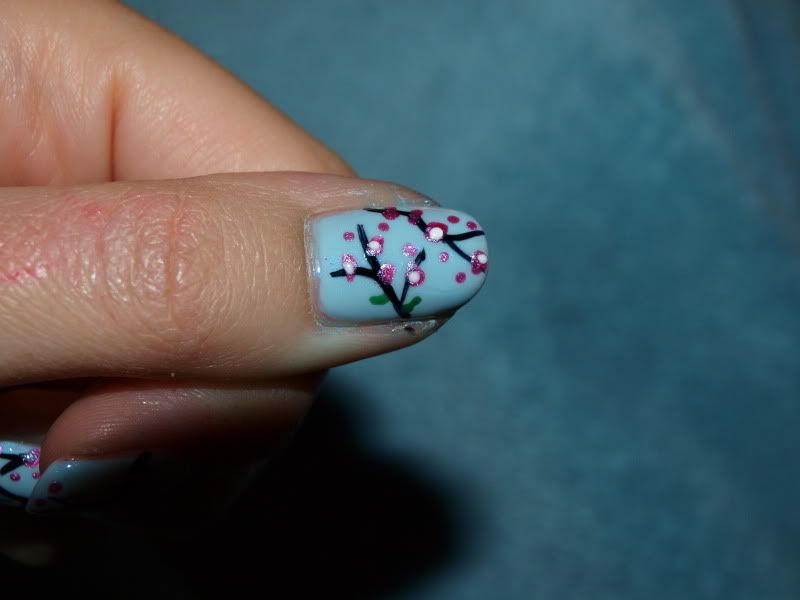
The other manicure I did used the water decals. You get two full manicures worth on the sheet (20 designs) in different sizes to fit your nails. I loved these, they were so easy to use and I really enjoyed applying them. All you need to do is cut around the design, place it into a little bowl of water, remove the backing and place it on the nail. They are repositional if you carefully do so before they dry. Then I sealed it all with topcoat. They lasted really well and I ended up taking them off when I was bored of it. I'm sure they would have lasted a few more days too.


What I used:
Butter London Lady Muck as the base colour.
One decal on each nail.
Seche Vite to seal and prolong the wear.

Overall I think they are really fun products to play with and incorporate into nail art, especially the fantastic water decals. The packs do not have instructions on them but they can be found on the Viva La Nails website.

Viva La Nails, themselves were really good with my order. It arrived quickly and I was happy with everything there. The website is really good and easy to browse. I also like the instructional videos and ideas that are given for the products. I will definitely be ordering from them again.

Nail art stickers can be purchased here.

Water decals can be purchased here.

Jennifer xx


* These products were press samples for review purposes. All opinions are my own from my own experiences testing the products.

Tuesday, 13 March 2012

Vintage Red Inspired Nail Art

I used to wear red nail polish a lot, I hadn't worn it in a long time so I felt it was time to wear it again. I wanted to something a bit different with it so added some nail pearls. I think it looks like old vintage pearl necklaces.


I didn't keep it on for long because the pearls were bugging me and a couple came off so I removed the rest.

Products used:
OPI Nail Envy
Eyeko Saucy Polish (2 coats)
Seche Vite
Nail Pearls
Another coat of Seche Vite to seal in the pearls.

Edit: I wrongly listed this red as Leighton Denny Indulgence but I've just remembered that it wasn't and I actually used Eyeko Saucy Polish - which I think is now discontinued. You could use any red however.

Jennifer x

Saturday, 7 January 2012

My Christmas Manicure

I took a break from blogging for the Christmas holiday period and totally forgot that I took these pictures of this manicure until I saw them on my camera. Thought I'd show you anyway even though they're too late.

I wanted to do something really festive and decided to do each nail different because I couldn't pick one thing. I thought it was really fun and got a lot of compliments on them.


What I used:
Thumb (snowflake)-
OPI Ogre the Top Blue as the base - 2 coats
OPI Last Friday Night over the top - 1 coat
Rio nail pen in white for the detail

Index/pointer finger (candy cane stripes)
Leighton Denny Pure White as the base - 2 coats
Rio nail pen in red for the stripes

Middle finger (gold bow)
OPI Affair in Red Square as the base - 2 coats
Rio nail pen in gold for the detail

Ring finger (green glitter)
Orly Here Comes Trouble - 2 coats

Little finger
OPI Russian Navy as the base - 2 coats
Rio nail pen in gold for the detail

Jennifer x

Tuesday, 8 November 2011

Bonfire Night Nails


I hope everyone enjoyed Bonfire Night. I love it, it is one of my favourite times of the year. Being British, the 5th November is an important historical date for us. To celebrate, my boyfriend and I went to a firework display which we have been going to for three years running. It is in Edenbridge Town, in Kent and they put on a fantastic show. They hold a procession down the high street with bands and floats. People dress up and all of the local children who take part seem to enjoy themselves so much. After the procession everyone makes their way to a nearby playing field where the fireworks will be held. There are stalls selling burgers, hotdogs, candy floss, toffee apples and hot drinks plus a teacup ride and fairground game for the littleuns. On the other side of the field stand two huge wooden figures, one of Guy Fawkes and the other of that year's 'celebrity Guy'. This year was the turn of Manchester City player Mario Balotelli, the footballer who managed to set fire to his bathroom with a rogue firework during a party... haha! After they have set fire to each Guy, the fireworks start and they are fantastic and enormous. I love going there.

As it was a special day, I decided to do a special manicure to go with it. I wanted to paint fireworks on my nails and this is what I came up with.

Monday, 31 October 2011

Happy Halloween!

Happy Halloween! Hope you enjoy whatever you're doing tonight. I don't celebrate Halloween but wanted to do some Halloween makeup. This is the first time I've ever done anything like this and I don't have any products such as liquid latex or spirit gum etc to do anything really creative so had to make do with what I had in my makeup collection. As per usual, I leave everything to the last minute and ended up doing this last night. I didn't know what I wanted to turn myself into and ended up making it up as I went along. I think it looks a little bit zombish although could have done with some more cuts and veins and rot haha - maybe next year.


I already had my makeup on from the day, my eyeshadow was very neutral in skin tones with a tiny bit of shimmer. This was mostly covered up. Because I didn't want it to look perfect, I just added more on top of what I already had on.

What I used:
  • White eyeshadow (MAC Gesso) applied all over with a small foundation brush, packed onto my skin and 'scrubbed' in to get it to look a little patchy. I couldn't find a very light foundation to use cheaply yesterday so made do with eyeshadow but you could use a light foundation instead.
  • Taupe-grey eyeshadow as a contour on a round eyeshadow brush to sketch out the shape and then blend downwards. Soften with a fluffy contouring brush. I used MAC Copperplate through my cheekbones, around the top of the nose to add shadow and depth to the eyes and along the jaw bone.
  • Brown-red eyeshadow under the eyes to make them look sore, I used MAC Folie. I also used this colour in areas where I wanted my skin to look bruised.
  • Grey eyeshadow under the eyes and on the lids to make them appear deeper set. I used MAC Scene.
  • Matte black eyeshadow all over the lid and underneath for a dead and smudged makeup appearance.
  • Reddish plum purple eyeshadow, I used the one from Sleek's PPQ palette to use around the bruised areas to darken and deepen the look of the bruises, I also used it in areas around the mouth and also smudged the excess on the brush around the nose to make my skin look blotchy.
  • MAC Cream O Spice lipliner all over lips, use something brownish.
  • For the blood I used MAC's Kissable Lip Colours in Love Peck and Strut Your Stuff. Fake blood would be ideal, liquid and gel based would give the best effect.

I also did a Halloween nail design.


I already had the base colours on for this, they are one of the new Nails Inc Gossip Girl kits (the Lily set). It is a deep plum black creme finish with a flake polish on top which flashes red-orange-green. I added China Glaze's Ghoulish Glow (glow in the dark nail polish) over the top of all fingers except the ring fingers. I used Illamasqua Gamma (neon orange) for the pumpkin and OPI Jade is the New Black (medium green creme) for the stalk and swirly leaves. I then added the face in China Glaze Liquid Leather (black creme).

I wasn't able to get a photo of the polish glowing in the dark, my camera just wouldn't pick it up, I probably need to figure out the correct settings. It is subtle but does glow. It needs to be in the light for a while to 'charge', it will eventually fade out and not glow, just like children's glow in the dark stars do. It also mutes the colour down but I like it for this as it makes it a swampy greenish colour.

Enjoy your Halloween!

Jennifer xx

Monday, 15 August 2011

I love cupcakes :D

After seeing a few cupcake manicures around the blogsphere I decided to do my own. I've had quite a few compliments already on it at work today although a lot of them think I have too much time on my hands... I think this took me around 30-40 minutes in total.


Colours used:
Nubar Yellow Primrose (cake)
Nubar Blue Hydrangea (blue cake cases)
Nubar Purple Aster (lilac cake cases)
Leighton Denny All About Me (pink cake cases)
Leighton Denny Heiress (purple case stripes)
China Glaze Snow Globe (glitter frosting)
Rio nail pens from the original set (red for cherries, blue for blue case stripes and purple-pink for pink cake stripes and over the purple stripes.)


Do you like them? I really enjoyed doing them :)

Jennifer xx

Monday, 1 August 2011

Watermelon Nails

I already had OPI Gargantuam Green Grape on my nails and wanted to jazz it up a bit. The colour reminded me of the stripes on watermelon skins so I decided that I'd do some watermelon nail art.


What I used:
Base colour: OPI Gargantuam Green Grape (light green)
OPI Come To Poppy for the watermelon flesh.
Rio Nail Art Pens for the white, darker green and black.

How I did it:
First apply base coat, I use OPI Nail Envy as a base and treatment - 2 coats, as per instructions.
Then apply two coats of Gargantuam Green Grape (or a light green).
Apply Come To Poppy in a semi circle shape, leaving a smallish gap in the green, one coat.
Let it dry and then use a green nail pen - I used the brush within - or a darker green on a detail brush to paint in the darker green stripes.
Use a white nail pen with a brush or white polish on a striper or detail brush to draw the white line between the green and pink, it will tidy up any mistakes and neaten up the edges of the pink if it isn't quite perfect.
Use a black nail pen and dot on little black dots for the seeds and before lifting the pen away, gently drag it down to create teardrop shaped seeds. You could use a toothpick or a teeny dotting tool instead with some regular black polish if you don't have a nail pen.
Let the polish dry and then apply a topcoat, I use Seche Vite. It is important to let the design dry first otherwise the topcoat will drag it.

I was really pleased how it came out and got quite a lot of compliments on them. I think Come To Poppy works well due to the iridescent in it which looks a bit like the flesh of a watermelon.

More pics!


What do you think?

Jennifer x

Wednesday, 27 July 2011

Lava Nails

This was a bit of a 'happy accident' as they started out rather crap and I hated them but was too lazy to start over. I thought I'd add some black crackle to see if I could rectify them by making them look even more messed up... without being messed up... if you see what I mean lol. Deliberate looking. I actually thought they resembled lava flows when I had finished, like the liquid lava with the solidified lava on top when it turns grey-black. I liked it and wore it for a full week and even my boyfriend liked it (he was biased though because it involved the colour orange which is his favourite).


I used Chanel Mimosa for the yellow base then used Butter London sheer jelly polish in Chuffed for the orange. I applied it straight from the brush in thin layers making a gradient towards the tip. You could sponge it on instead or use a more opaque colour when sponging and fade it upwards towards the cuticle instead if you didn't have a sheer or jelly shade. Then I used BarryM black crackle on top and sealed it all with a coat of Seche Vite - my top coat of choice, I'm on my third bottle of this now!

This would be really easy to change up the colours to whatever you wanted and I will be trying it again in the future, I'm thinking of purple and blue with silver shatter on top!

I'm off work sick today so I'm going to try to mess around with some makeup to create some different looks while I have a chance and will be getting those up soon :)

Jennifer xx

Sunday, 12 June 2011

Cherry Blossom Nails - Take 2

Every time I look at my most viewed posts, my cherry blossom nails that I did a while ago are one of the top posts. Considering that they came out terribly, I've been wanting to redo them. I used Barry M Blue Moon as my base colour and then used my Rio Nail Art pens which I got from Amazon recently. I think they are excellent so far and I will be reviewing them fully in a few weeks once I've got to use them a few more times to try out different things.


I'm actually really pleased with how it came out, much better than my last attempt! What do you think?

- Jennifer
Related Posts Plugin for WordPress, Blogger...