Sunday, 27 February 2011

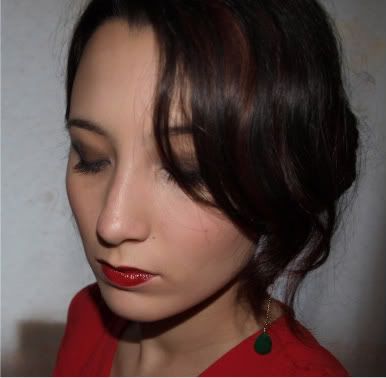
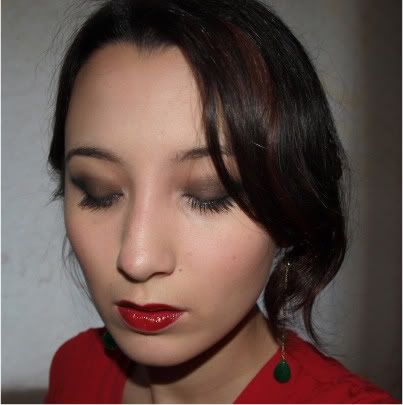
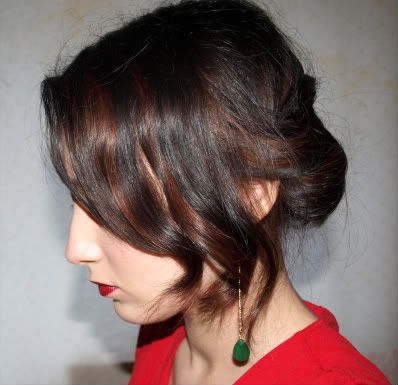
1920's Inspired FOTD

I love vintage styles, especially things from the 1920's and 30's like Art Deco and flapper dresses. Here are some of the images that inspired this look.

Clara Bow
Bebe Daniels

Louise Brooks

Anita Page
Marceline Day
I think women from this era were just so classically beautiful. They always wore a red lipstick, often a dark red shade. Their eyeshadow drew out into a point to excentuate the eye, using a sultry dark grey or black. They would often bleach their skin and powder it white as this was a time before Coco Chanel popularised the sun tan. Blush was applied onto the apples of their cheeks in a doll like way and mascara swept through their lashes in an outwards motion towards the outer corner. I wanted to create a look which was inspired by these women but make it wearable for nowadays. My skin isn't as light as these women, my hair is longer and my eyebrows thicker (I'm not plucking them that thin!) so this is my take on it.


Face: MAC Studio Sculpt Foundation NC20 (a lighter colour could be used to make it more accuarate), Bobbi Brown Corrector (Light to Medium Bisque), Bobbi Brown Concealer (Beige), Collection 2000 Translucent Powder (I really powdered my face, much more than I would usually do to make it matte), MAC Oh So Fair Beauty Powder on apples of cheeks and then blended back lightly, MAC Plum Foolery blush stippled onto apples to make them brighter.
Eyes: MAC Carbon eyeshadow, Urban Decay Creep (ideally you would want a dark black matte eyeshadow but I only have Carbon and it is more of a soot colour.)
Lips: Illamasqua Sangers applied with a lip brush, slightly altering the shape of my lips to make them more pouty, MAC Love Peck applied with a brush over the top (the lips were darker in real life than shown here) and MAC Strut Your Stuff added to the centres to brighten them up.


For my hair, I just washed and blow dried it then while I did my makeup, tucked it behind my ears so when finished it has a wave in it. Then I picked up the right side and twisted it around the back of my head, fastening as I went along then when I got to the left side I just twisted it back down to create a sort of false bun. I think I used about four grips in total so it was really easy to do.

- Jennifer

Saturday, 26 February 2011

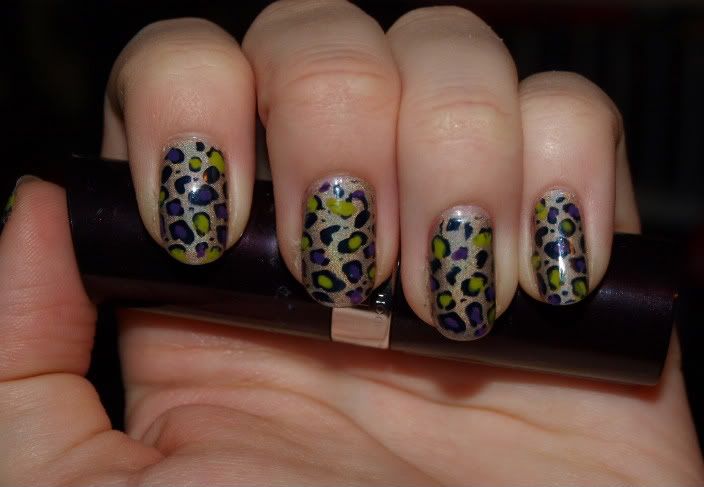
My first Konad-ing attempt!


I bloody love Konad! It was so much fun to do this and I was actually really pleased with how it turned out. I missed a few bits while transfering it onto my nail but I don't think it is too bad for a first attempt. I used China Glaze FYI for the base colour then stamped using the leopard design from image plate M57. I filled in the spots with OPI Funky Dunkey (purple) and OPI Who The Shrek Are You? (lime green).

What do you think?

- Jennifer

Friday, 25 February 2011

WAH Nail Pens by Models Own Review


I had wanted to get into nail art and then heard about these pens which are a collaboration with WAH Nails. They have a nib and a stiper brush and for around £6 I thought that wasn't too bad. They only come in black and white but Models Own are looking to expand to create pens for all of their colours.

When I first got these, I thought the packaging was nice and the actual pens seemed good. I really looked forward to using them. The packaging gives some ideas of designs you could do such as leopard print (pictured), camouflage, zebra, eye balls - all which are WAH Nail designs. The nib has a pin which you need to remove before using it and replace afterwards to stop the nib getting clogged. To get to the striper brush, you twist where the grip is and it unscrews.


The brush itself isn't that fine and tends to splay out or bend during use which doesn't help to get accurate lines. I think a synthetic bristle brush in an artist's rigger style would have been a much better choice as the bristles would spring back into place, keeping it's sharp shape.


To use the nib, you need to squeeze the pen. This has it's pros and cons. It is good because it means you don't need to press the nib down on the nail to activate the polish flow but the bad thing is the pen is quite hard and that makes it difficult to squeeze to get a constant line. Also it can blob polish out if you don't get the pressure exactly right. It would have been a better design to use a more flexible plastic in the squeezable area so you didn't need to excert as much pressure and making the pen easier to use especially with your non dominant hand.


These aren't the only problems with these pens. There is one thing which is a complete FAIL...
Hmmm... that's strange... I'm sure there was meant to be a brush attached to this one... oh yeah, it fell off! After doing a little design on 5 of my nails I noticed the brush wasn't working properly and on closer inspection I saw that it was shedding. I gently removed the loose hair and it seemed to work again. Soon after the same thing was happening, more and more hairs started to come away and then all of a sudden the whole damn thing came off! Useless! I haven't sent it back as I bought it from ASOS and I don't think I've got the invoice anymore and I'm not sure I can send it back to Models Own directly. Besides, I don't want a replacement. I think this product is lacking a lot, even if the brush did stay on. It is difficult to use and badly designed, the brush issue just tops it all off. I'm not the only one who has had a problem with the brush coming away, lots of people have experienced it so there is definitely a design flaw with these. If Models Own are planning to expand to their whole colour range, maybe they should consider actually fixing the problem first, possibly redesigning the whole pen to make it easier?

Whatever you do, don't waste your money on these. Go buy some nail brushes or go to a craft shop for a rigger brush or fine detail brush and that way you can use any colour you want. I am considering getting the Rio Nail Art Pens at some point, they seem to have quite good reviews so if you do want some pens, maybe check out the reviews for these instead.

- Jennifer

Nubar Reclaim

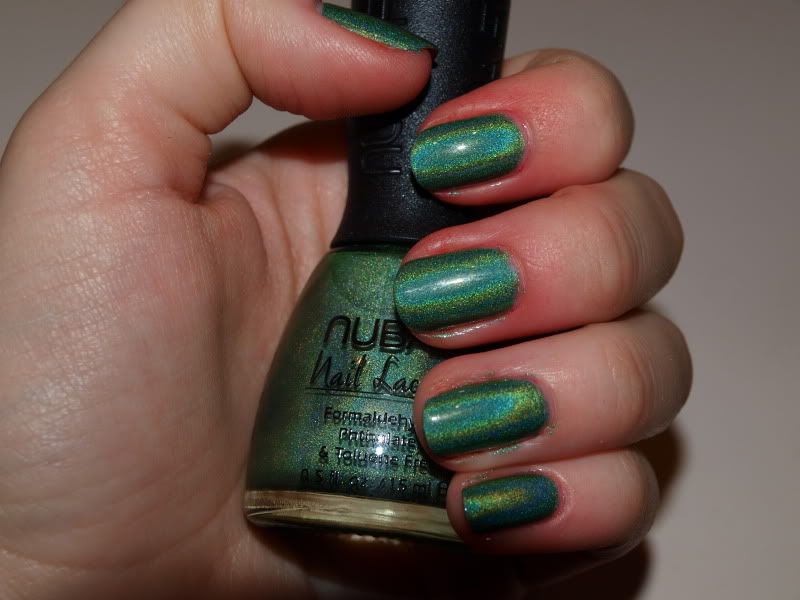
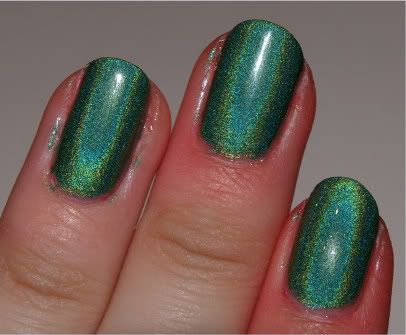
Ooooooh! Ahhhhhhhh! Lookie! I am a green fiend and I adore holographic nail polishes so when I found out that Nubar had made this, I hunted it down. I got it from Feel Unique (super quick delivery) for £6.80. It was worth every penny. Application was a dream, so smooth and perfectly opaque in two coats. It didn't streak at all and when it came to removing, it slid right off with ease. I ended up taking it off after a few days to try something else out, it hadn't chipped at all. It is a linear holographic like the China Glaze OMG collection opposed to the scattered holographic types which are more like the Nubar Prisms. And what makes it even better? It is green! Definitely one of my favourite polishes.


My fingers are a bit red by the way because they were a little stained from the previous colour.

So what do think? Are holographics your thing? Would you wear this?

- Jennifer

MAC Peacocky Mega Metal Eyeshadows Review


Odalisque, Ego, Dalliance, Centre Stage, Sex-pectations, Unflappable
I'm sorry I've taken so long to put this review up. Hopefully if this review makes you want to get any of the colours, they are still available. I purchased six of the colours, they all looked incredibly pigmented and the texture looked gorgeous so I had high expectations of them. The definitely live up to it, they are stunning in the flesh and wear beautifully.
The shades I picked up were:
Odalisque - Turquoise/teal
Ego - Forest Green
Dalliance - Champagne with what looks to me as a bit of golden green
Centre Stage - Chocolate Brown
Sex-pectations - Cranberry
Unflappable - Black/grey with purple tones.

Odalisque, Ego and Dalliance are colours that I often get drawn to, I liked the purply black/grey of Unflappable and thought it would look fantastic with a smokey eye. The other two, Centre Stage and
Sex-pectations are colours that I wouldn't usually go for - browns just don't tend to pull me in and I'm not usually a fan of redish colours. However, Temptalia did a look using these along with Dalliance and it looked beautiful so they were added to my list. I have since recreated it a few times and really love it.

Read on for my review!

Tuesday, 22 February 2011

Pink Spikey Flower Nail Art

So after getting those awful WAH nail pens (sorry for the slow review, it will be up this week!) and the disaster of the disintegrating brush, I decided to get myself down to a craft centre for some thin brushes. I originally wanted some rigger brushes (For those who don't know, they are very fine brushes with length to the bristles but not as long as nail stripers. They are called so because painters traditionally use them to paint the rigging of boats in their work) but they didn't have any so I got some shorter versions. As you can see, longer brushes would have made the tapered ends crisper and finer but these brushes will do for now. I also got some craft rhinestones. I wasn't sure how they'd react with the solvents in nail polish but figured I'd try them anyway. They came in a carousel wheel and are by the well known craft brand Anita's if any of you are interested.

The colours I used were Leighton Denny Berry Nice for the base, Leighton Denny Pure White for the stripes/petals with a little bit of Leighton Denny Cascade (sheer multi coloured fine glitter) over the flowers. Then I dabbed a bit of clear polish where I wanted the gem and gently pressed it down. Two coats of topcoat to be sure it was sealed on (1 regular topcoat, 1 Seche Vite). The gems didn't come loose at all until I wanted to take it off and it was quite hard to get them off so they were well glued lol!

What do you think?

- Jennifer

Transdesign Haul!

Don't you just hate how much OPI and China Glaze nail polishes cost in the UK? £10.50 for a bottle of OPI is just extortionate! While they are fantastic quality and my favourite brand of nail polish, I do begrudge having to pay that price when they are so much cheaper in the USA. I used to buy my polish from ASOS singly or QVC in kits to get a bit of a discount and there are a few cheaper UK based e-tailers that sell them a bit cheaper. Then while online, I read about Transdesign and the fantastic prices of the big brand nail polishes they stock. They are a US based e-tailer and sell OPI for $5.75 and China Glaze for $2.99, a BIG difference! I was very dubious before as I didn't know how much the shipping would be and didn't was to incur import tax to set it over the edge, making it not really worth ordering. Then I read that they did flat rate shipping for $20 which you can get up to 9 bottles of polish in (any brand) and I decided to take the plunge. I didn't think that was too bad for shipping really when we can pay £4.95 here sometimes for standard shipping and the warehouse might only be up the road.

Despatch was very quick and my parcel arrived about a week later! Very good service there I think. I mainly chose OPI but picked out a couple of Color Club polishes to try.

Read on for my haul!
Related Posts Plugin for WordPress, Blogger...