Monday 15 August 2011

I love cupcakes :D

After seeing a few cupcake manicures around the blogsphere I decided to do my own. I've had quite a few compliments already on it at work today although a lot of them think I have too much time on my hands... I think this took me around 30-40 minutes in total.


Colours used:
Nubar Yellow Primrose (cake)
Nubar Blue Hydrangea (blue cake cases)
Nubar Purple Aster (lilac cake cases)
Leighton Denny All About Me (pink cake cases)
Leighton Denny Heiress (purple case stripes)
China Glaze Snow Globe (glitter frosting)
Rio nail pens from the original set (red for cherries, blue for blue case stripes and purple-pink for pink cake stripes and over the purple stripes.)


Do you like them? I really enjoyed doing them :)

Jennifer xx

My Makeup Brushes Part 1 - Face brushes

This is a little insight to my brush collection, I love makeup brushes and have quite a few of them now. Most of mine are from MAC which are my favourite (although there aren't many brands which I have tried) and I also have most of the Real Techniques by Samantha Chapman (one of the Pixiwoo sisters) brushes which are also excellent. Other than that I have a few Bobbi Brown brushes, a couple from E.L.F and some random crappy brushes.
I really want to try Illamasqua's brushes, mostly because they are all synthetic so can be used with cream products easily. I'm also curious about Ecotools.

There are a couple of brushes which are on my wishlist, a smaller blush brush, probably the 116 from MAC and also the upcoming 226 which is released in the MAC Me Over collection, due for release in September for the UK. I will probably get two of those as it is a limited edition and people rave about it, I do like a nice crease brush so I'm looking forward to trying it.

This is how I store my brushes, in two mugs. The one on the left has my name on it, which was a present from someone. The other is a Tim Minchin (one of my favourite comedians - check him out here) mug which I got from one of his gigs, it says 'Rock n Roll Nerd' which is one of his songs. I have my face brushes in my Tim mug and my eye brushes in my pink mug.


Sunday 14 August 2011

Semi Precious Eyeshadow Experimentation

This post is to show how the Semi Precious eyeshadows can be applied over different kinds of bases to get different effects with them. This post is just going to be pictures and what I used under each shade so hopefully you can see what effects you can get with the ones I tried. If you have any of them, you should experiment yourself to see what happens. All swatches were done dry.

Dark Indulgence:
Bases used L-R: NYX Milk, NYX Rocky Mountain Green, Urban Decay Graffiti 24/7 Liner,
Urban Decay Mildew 24/7 Liner, MAC French Quarter greasepaint stick, MAC Bare Study Paint Pot,
MAC Chilled on Ice Paint Pot, MAC Dangerous Cuvee Paint Pot, MAC Ivy Fluidline,
Top three swatches: Bobbi Brown Ivy Shimmer Ink, Bobbi Brown Forest Shimmer Ink, Illamasqua Bedaub Cream Pigment
Unsurpassable:
Bases used L-R: NYX Milk, NYX Rocky Mountain Green, NYX Pure Gold,
Urban Decay Graffiti 24/7 Liner, Urban Decay Mildew 24/7 Liner, Collection 2000 French Kiss eyeliner,
MAC French Quarter greasepaint, Illamasqua Bedaub Cream Pigment,
Top tow swatches: Mac Bare Study Paint Pot, MAC Chilled on Ice Paint Pot

Thursday 11 August 2011

MAC Semi Precious Mineralize Eyeshadow Reviews


I'm so late for putting this up but I have had a good chance to test run them since I've had them. Every year MAC put out a mineralize collection and this year's offering was Semi Precious. I originally didn't plan on getting any of the eyeshadows because I'm not normally a fan of the mineralize formula. However, once I started seeing swatches coming out I loved the look of them, they seemed so multi-dimensional and beautifully sparkly. Not only that but they were gorgeous in their pots, I loved the marbled effect which resembled little planets. I ended up getting quite a few of them, 9 in fact out of the 12 available!

As with all mineralized products which have marbling, each one is unique even when they are the same product, the marbling can differ greatly from one to another. It is best to choose them in person from a store and you will be able to choose one which suits your tastes best. I didn't get a chance to go to a store so ordered mine online. I was quite lucky with the ones I received, they are all beautifully marbled and have good amounts of each colour within them, allowing me to pick out individual colours if I wish.


Sunday 7 August 2011

Using Sleek Monaco Palette - Mixing Greens

As you might know, I am a complete green fiend. Green is my favourite colour, especially to wear on my eyes. In Sleek's Monaco Palette, there is only one green and I found myself wanting to create a green look and wanting to add other greens into the look but that would defeat the object of using only this palette. So I decided to mix my own greens using other shades in the palette to darken the existing green.

This is what I came up with...

Read on for more...

Monthy Favourites: July 2011

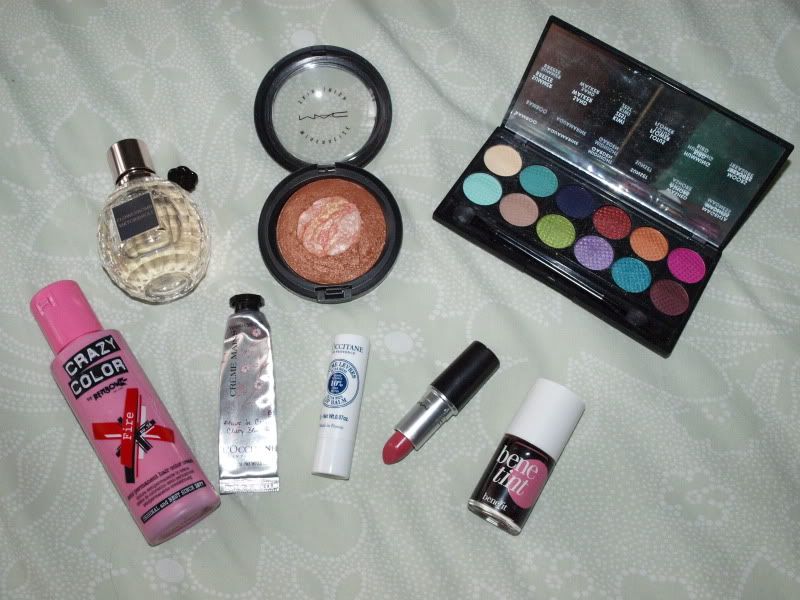
Hello all! It's that time again so let's get started. These are the products I've been using a lot during July.


First up, my newest perfume, Viktor and Rolf's Flowerbomb. It is a lovely perfume, floral, hence the name but with a good amount of sweetness to it but not so that it is cloying. It is a bit powdery and has a hint of fruit. I've got the EDT version, it is quite a strong perfume so you don't need a lot.

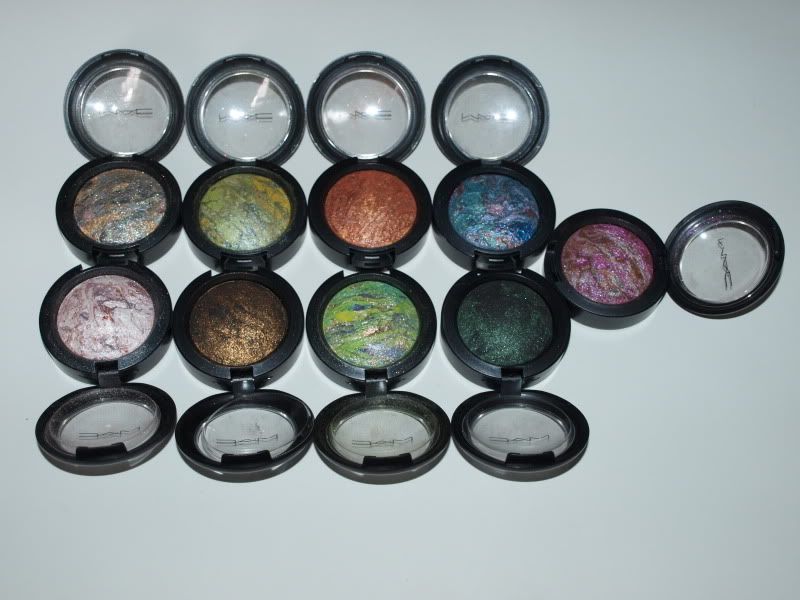
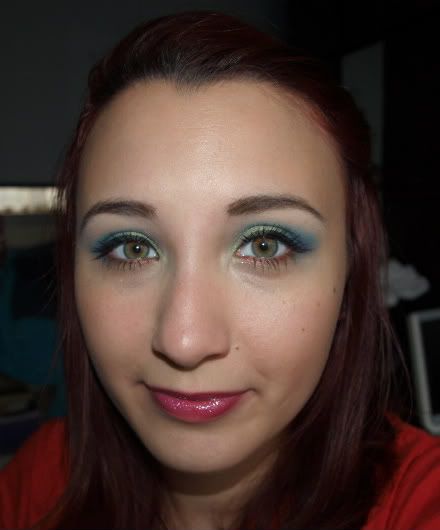
Next, MAC Semi Precious Goldstone MSF. I need to get my reviews up for this collection still. I'm a big fan of mineralize skinfinishes from MAC, I have a few different ones and enjoy using them a lot. I love the glow they give and their ability to highlight, blush and contour all in one (if it is a colour which isn't too light) The MSFs in the Semi Precious collection are quite special because they come with a splodge in the middle of a different colour. Goldstone allows you to use the middle to highlight and the outside to contour or use as a bronzer. Or you can mix them together and get a soft warmth to your skin. I love using this mixed on my cheeks and into my temples. It gives me a little bit more colour and makes me look like I've been on holiday.

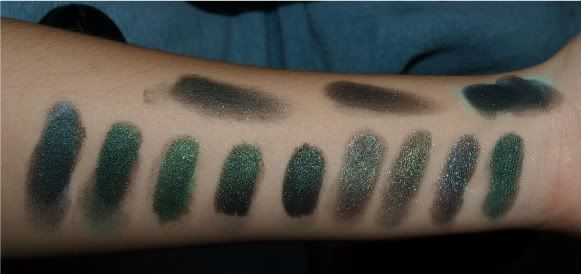
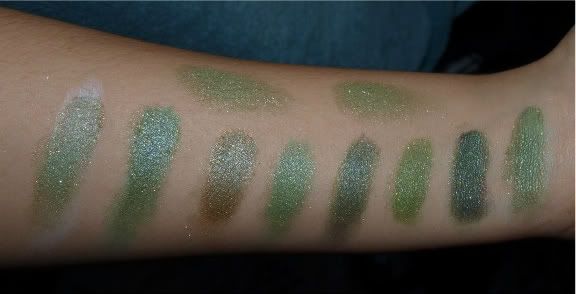
Sleek's Monaco iDivine palette is next, if you have seen my Sleek look posts you will know that I have been getting good use out of it. It is a really fun, summery palette and has some gorgeous well pigmented shades in it. It has converted me to Sleek and I'm really looking forward to whatever future releases bring.

In the bottom row, the first product is Crazy Colour in Fire Red. I've had my hair coloured red at my hairdressers a while ago and she recommended using this when I washed my hair to prevent fading. For every other hair wash, I mix some of this with my conditioner and leave it on my hair for 10 minutes then wash out well. It boosts the vibrancy of my hair so that it doesn't look faded. Definitely something to try if you have coloured red hair as it tends to fade quite quickly. There are a large range of colours from Crazy Colour, blues, violets, greens etc so whatever colour your hair has been dyed, you colour probably find a suitable shade to use to 'top it up'. No peroxide is needed so it is easy to use.

Next to that are two L'Occitane products, one is a hand cream - this one is the Cherry Blossom one and the other is the Shea Butter lip balm. I always use L'Occitane hand creams, they are my favourite and work so well. The only one I dislike is the honey version because I don't like the smell of honey. They do have different consistencies but they are all lovely and moisturising. The Shea Butter one is the thickest and the Verbena is the most gel like. If you have dry skin or eczema, like me, try these out because I really find they work. The tube pictured is just a 15ml mini size but they do 30ml and larger sizes. I have a 100ml tube of the Shea Butter one for when my hands are horrendous.

The lipbalm is a really good product, the one I have is a trial size, it only has about 1cm of product in it but it is enough to realise how good this is for my lips. I tend to have dry lips but this deals with them so well, I will be repurchasing this when I'm out of it.

The lipstick is MAC Gem of Roses, another product from the Semi Precious collection. This is my perfect 'my lips but better' shade. It has a lustre finish so I find it quite moisturising although they never last very long on lips. It never looks bad when it fades though because it merges in with my natural lip colour anyway. I like this for days when I either can't be bothered to put much on my face or when I have a lot on my eyes.

Lastly is Benefit Benetint. This is a fantastic product for summer, once it is on, it just does not budge. It gives a perfect healthy flush to cheeks and looks so natural. You can use it on lips as well but I'm not really a fan of it on me because I find it quite runny so takes a while to get it looking even and it does fade unevenly from my lips throughout the day as I'm eating. For my cheeks though, I love it.

So there we go, has anyone else tried these products? What do you think of them?

Enjoy the rest of the weekend!

Jennifer x

Tuesday 2 August 2011

Using Sleek's Monaco Palette - Mermaid Teals

My next look with Sleek's Monaco palette was inspired by mermaids, the blues and greens of the sea and shimmer. Green and teal are also my favourite colours to wear on my eyes, I think they bring out the green tones in them. I decided to put purply pink lips with it to finish off the bright look.


On my eyes I used Kiwi Zest (shimmery lime green) as the base colour, I added Aquamarine (matte turquoise) into the crease and blended upwards and slightly onto the outer part of the lid. I used Humming Bird (shimmery teal) through the crease to add definition and sparkle. Then I used Bamboo to blend all of the colours together nicely under the brow bone and to neutralise the pink in my brow bone. I applied Sunset (shimmery copper) along the lower lashes.

On my lips I wore MAC Rebel lipstick, gently patted on and smooshed together with my lips and then topped it with MAC's Fab Fun lipglass (this was limited edition with one of the lipglass sets from Tartan Tales last Holiday season - it is a sheer pink with iridescent sparkles, really pretty)

More Pics!

Monday 1 August 2011

Watermelon Nails

I already had OPI Gargantuam Green Grape on my nails and wanted to jazz it up a bit. The colour reminded me of the stripes on watermelon skins so I decided that I'd do some watermelon nail art.


What I used:
Base colour: OPI Gargantuam Green Grape (light green)
OPI Come To Poppy for the watermelon flesh.
Rio Nail Art Pens for the white, darker green and black.

How I did it:
First apply base coat, I use OPI Nail Envy as a base and treatment - 2 coats, as per instructions.
Then apply two coats of Gargantuam Green Grape (or a light green).
Apply Come To Poppy in a semi circle shape, leaving a smallish gap in the green, one coat.
Let it dry and then use a green nail pen - I used the brush within - or a darker green on a detail brush to paint in the darker green stripes.
Use a white nail pen with a brush or white polish on a striper or detail brush to draw the white line between the green and pink, it will tidy up any mistakes and neaten up the edges of the pink if it isn't quite perfect.
Use a black nail pen and dot on little black dots for the seeds and before lifting the pen away, gently drag it down to create teardrop shaped seeds. You could use a toothpick or a teeny dotting tool instead with some regular black polish if you don't have a nail pen.
Let the polish dry and then apply a topcoat, I use Seche Vite. It is important to let the design dry first otherwise the topcoat will drag it.

I was really pleased how it came out and got quite a lot of compliments on them. I think Come To Poppy works well due to the iridescent in it which looks a bit like the flesh of a watermelon.

More pics!


What do you think?

Jennifer x
Related Posts Plugin for WordPress, Blogger...